
First project creation 
There are several ways to get started. Go to the chapter that best matches your use case:
Creating an empty project gives developers full control and flexibility. Developers can customize the environment, avoid unnecessary components, and optimize workflows. This approach is ideal for learning, experimentation, and creating scalable, maintainable code. It also fosters a deeper understanding of project setup.
Importing a project from STM32CubeMX provides a quick and efficient way to start development with preconfigured peripherals, clock settings, and middleware. This method ensures best practices, enhances code reliability, and integrates seamlessly with STM32CubeIDE for Visual Studio Code to simplify debugging and project management.
Importing an example project from STM32CubeMX into Visual Studio Code provides a quick start with preconfigured settings, peripherals, and middleware. These projects save time, follow best practices, and serve as valuable learning tools. Developers can focus on application-specific features and accelerate development.
Create empty project 
- Step 1: Initiate project creation
-
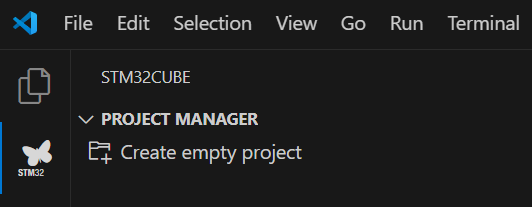
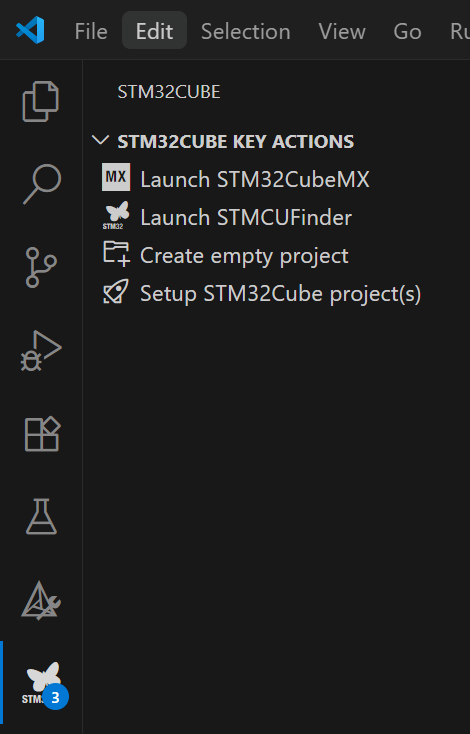
First, open the STM32CubeIDE for Visual Studio Code extension by clicking the STM32CubeIDE for VS Code butterfly icon in the Activity Bar. Click the “Create empty project” button to start setting up a new project.
- Step 2: Name the project
-
Enter a name for the project.
- Step 3: Select project type
-
Choose whether the project targets a device or a board . This selection determines the specific hardware configuration for the project.
- Step 4: Choose the target
-
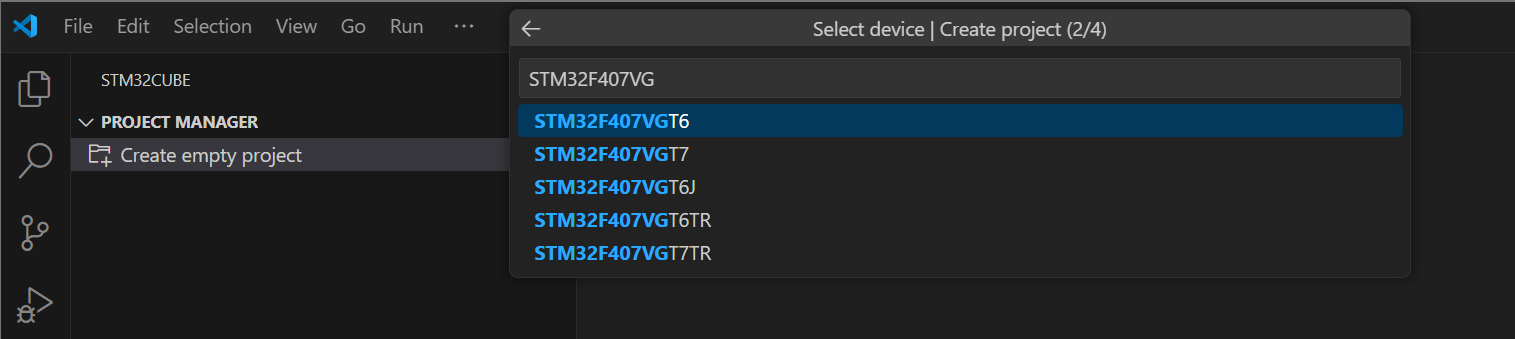
Select the correct target from the drop-down menu. This configures the project for the specific STM32 device or board.
Note
The list is data-driven. The MCUs and boards shown are based on CMSIS-PACK PDSC files.
- Step 5: Define project location
-
Select the directory where the project files will be saved.
- Step 6: Select toolchain
-
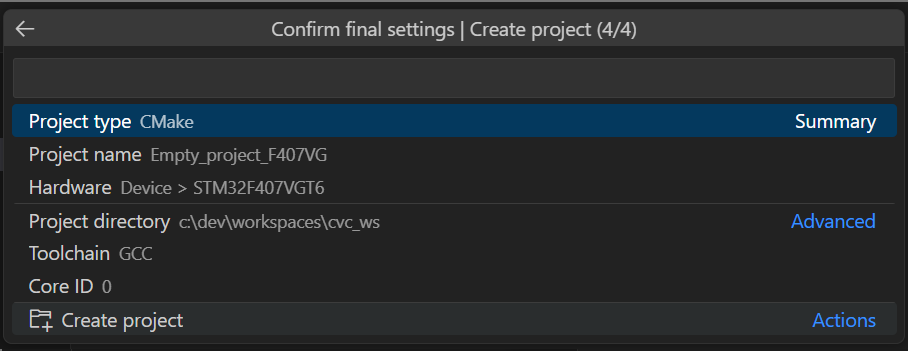
Select the toolchain to use. The toolchain determines the set of tools and libraries for building and managing the project. By default, GCC is selected. After selecting the toolchain, click “Create project” to continue.
- Step 7: Open project
-
- Visual Studio Code prompts you to choose how to open the new project. The options are:
-
-
Open in this window . Reuses the current instance of Visual Studio Code.
-
Open new window . Opens a new instance of Visual Studio Code.
-
Add to workspace . Adds the project to the current instance of Visual Studio Code (multiple projects in parallel).
-

- Step 8: Select CMake preset
-
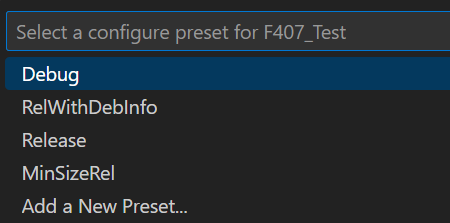
Select the CMake preset (Debug or Release) and build configuration for the project.
- Step 9: Run CMake configure
-
After selecting the CMake preset, CMake runs the configure step on the active preset context (for example, Debug). This process generates the necessary build files and creates a new folder in
build/$CMakePresetName.
By following these steps, you create an empty project in the STM32CubeIDE for Visual Studio Code extension, ready for development.
Import STM32CubeMX project 
- Step 1: Initiate project creation
-
Open STM32CubeMX standalone and click File > New Project to start setting up a new project.
- Step 2: Choose the target
-
Choose whether the project targets an MCU/MPU or a board. After selecting the device, click Start Project .
- Step 3: Select toolchain
-
Enter a project name and select CMake as the toolchain/IDE.

To open in Visual Studio Code, see the Open in VS Code guide.
Import example project 
Tip
This operation is also available through the command-line interface. For more information, use the command:
$ cube project_extractor --help
- Step 1: Initiate project creation
-
Go to the STM32Cube key actions menu and select Import STM32Cube example(s) .
- Step 2: Choose the folder
-
Go to the root folder of the firmware pack for the board or MCU and click Select .
- Step 3: Open the example selector
-
A list of the available examples appears in the example selector window. Select the example to import. In the Action column, click the icon to import the project.
- Step 4: Select folder for extraction
-
Select the folder where the project is exported for use in Visual Studio Code.
Open in VS Code 
- Step 1: Open folder
-
Open the newly created project in Visual Studio Code. Go to File and select Open Folder… .

- Step 2: Select configure preset
-
After opening the project, select a configure preset . In this guide, “Debug” is selected.
- Step 3: Setup STM32Cube project
-
To make CMake aware of the project, go to the STM32CubeIDE for Visual Studio Code extension and click Discover STM32Cube project .
- Step 4: Project Setup
-
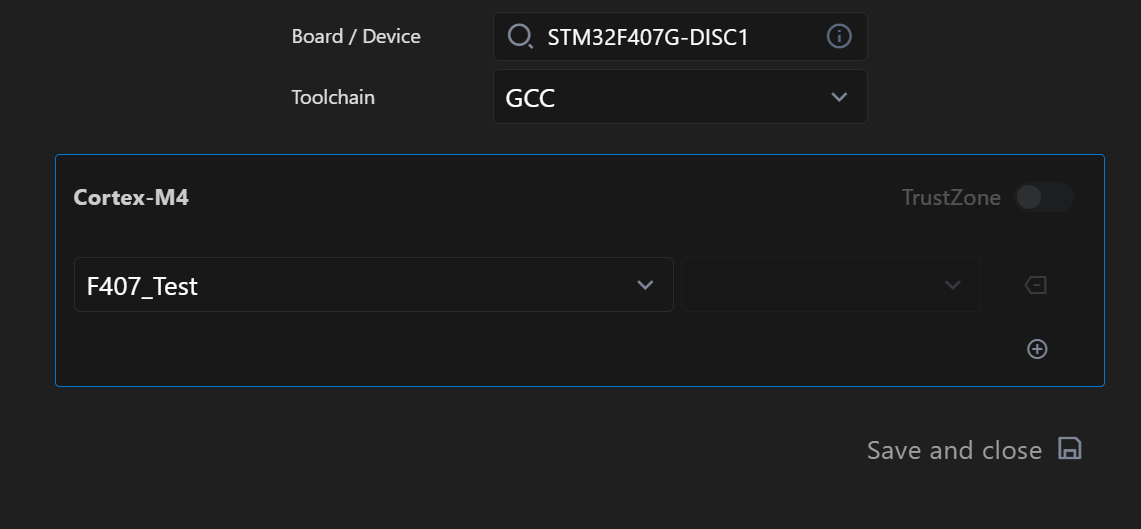
Select the board or device, toolchain and project to target. Because this guide uses a single-core board, select the main project. After making selections, click Save and close .
The output log should look similar to the following:

If the output log matches, the project is ready to build. Refer to the Build guide for instructions.