
 STM32CubeIDE

Workspace and projects 
STM32CubeIDE is built using the Eclipse ® framework; it inherits characteristics that might be unfamiliar to new users.
The Eclipse ® editing environment uses perspectives. A perspective is a set of windows dedicated to a purpose.
The C/C++ perspective is dedicated to writing and editing code, and navigating through projects. Users spend a lot of time in this perspective.
Figure 2. STM32CubeIDE with C/C++ perspective open, no project defined yet
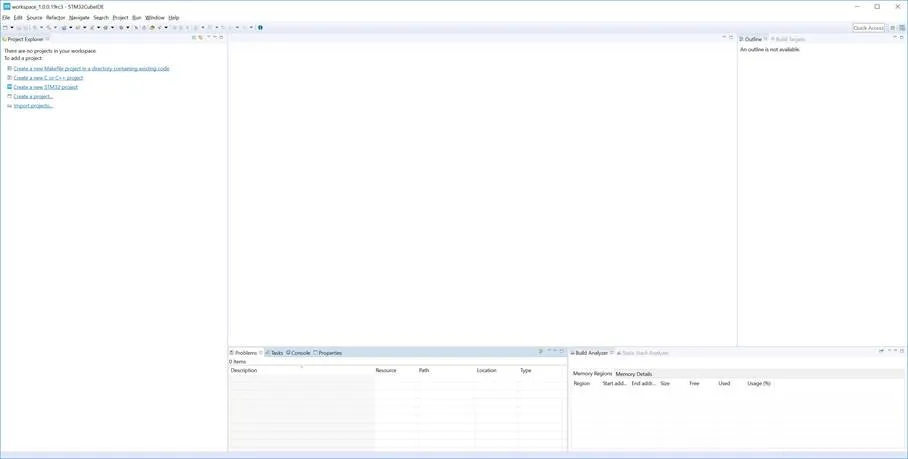
Another popular perspective is the Debug perspective, where users debug and test. Switching back and forth between perspectives is easy, and can even be automatic in some cases.
Workspace and projects
The next thing to do is create a project, which requires to introduce firstly the concept of workspace. A workspace is a container that includes project folders or information about project folders, and a .metadata folder that contains information about the projects. A workspace is simply a folder on a hard drive, which can be located anywhere in the storage media. When STM32CubeIDE starts up, it asks which workspace must be used. This may be changed at any time by selecting [File]>[Switch Workspace] and navigating to another folder.
Figure 3. STM32 project creation
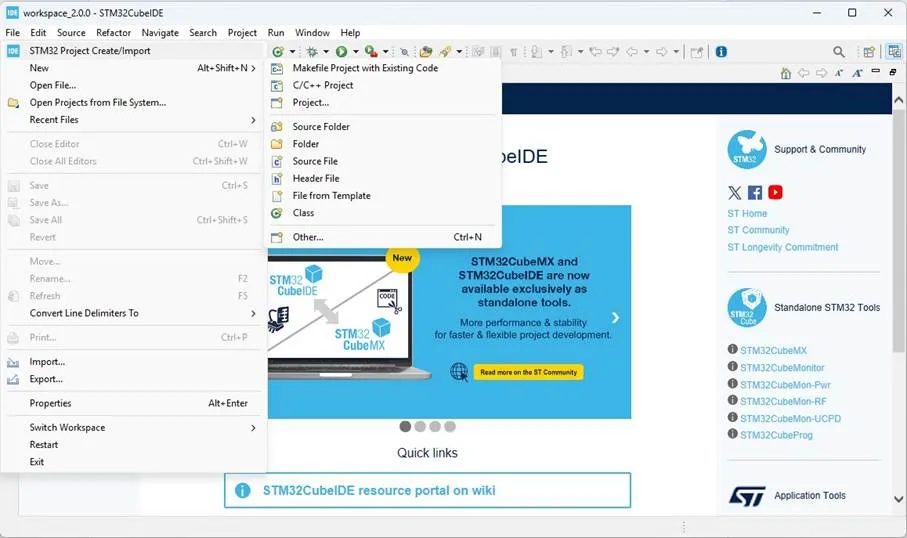
Note:Workspace and project names must contain only ascii characters. This is also valid for the path to the workspace.
Project types in STM32CubeIDE 
STM32CubeIDE enables users to:
•Create new projects from scratch for STM32 microcontrollers like empty projects or Empty CMake projects. This process allows full customization of the project configuration, including device selection, firmware package management, and peripheral initialization.
•Import existing projects, including those generated by STM32CubeMX or STM32CubeMX2 , as well as projects using Makefile or CMake-based build systems.
Start from scratch with STM32CubeIDE 
STM32CubeIDE allows users to create empty projects and empty CMake projects.
Start from scratch - STM32CubeIDE empty project
To create an empty project, proceed as follows:
Select the [[File]> [STM32 Project Create/Import]> [Create New STM32 Project]] command. The pop-up window is illustrated in Figure 4.
Select STM32CubeIDE project from the Create New STM32 Project menu.
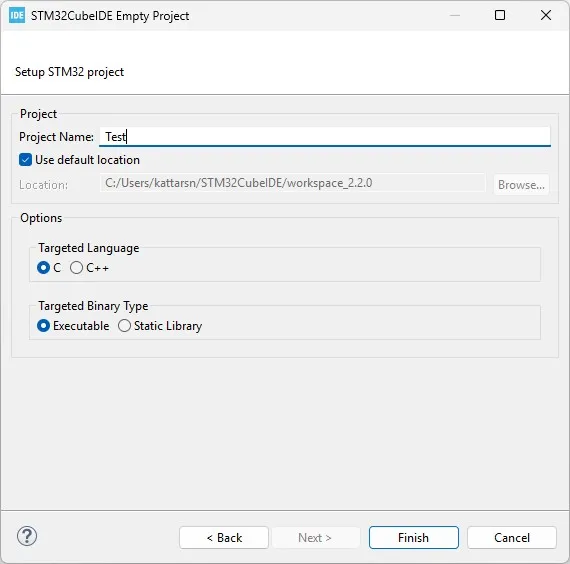
Follow the wizard displayed to select MCU and enter the required data: project name, Targeted Language and Targeted Binary Type. This is illustrated in Figure 5.
Click on [Finish]. Illustrated in Figure 6.
Figure 4. Create new STM32CubeIDE project wizard
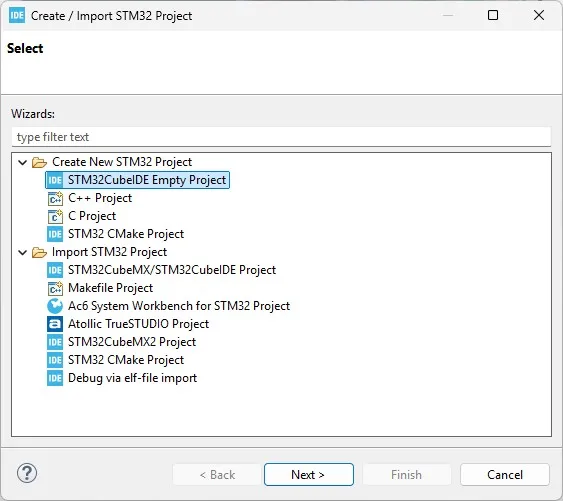
Figure 5. STM32CubeIDE MCU selection wizard
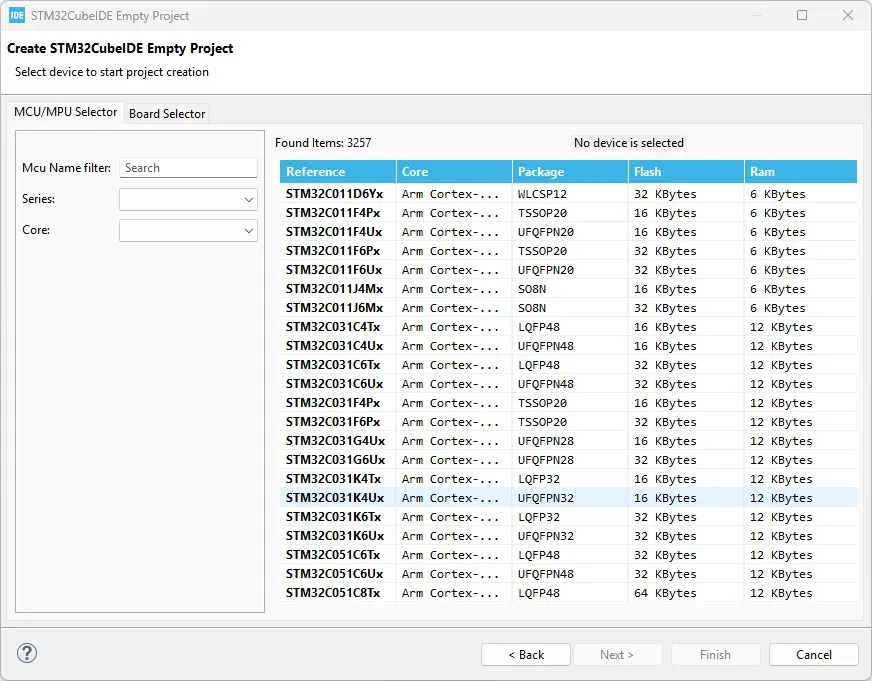
Figure 6. STM32CubeIDE empty project wizard
Start from scratch – STM32CubeIDE empty CMake project creation
To create an empty CMake project, proceed as follows:
Select the [File]> [STM32 Project Create/Import]>[Create New STM32 Project] command.
Select STM32 CMake project as illustrated in Figure 7.
Follow the wizard displayed to enter the following information as illustrated in Figure 8:
– Project name.
– Select template such as Executable or Static Library.
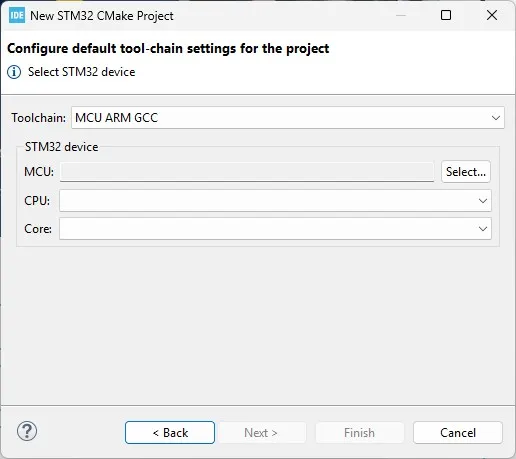
– Select the required MCU.
Click on [Finish]. Illustrated in Figure 9.
Figure 7. Create new STM32 CMake project wizard
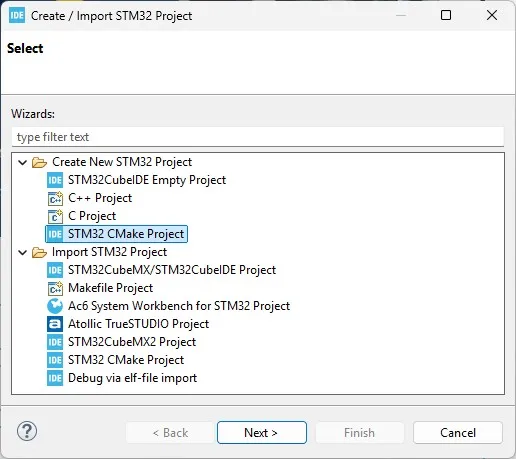
Figure 8. New STM32 CMake project wizard
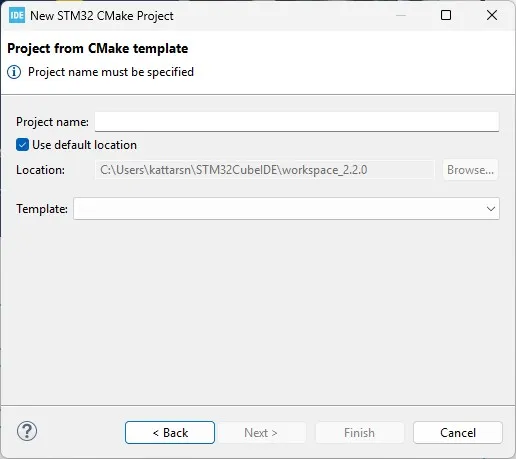
Figure 9. CMake MCU selection wizard
Start from existing project with STM32CubeIDE 
STM32CubeIDE allows users to import projects generated by STM32CubeMX or STM32CubeMX2.
Start from existing project: Import STM32CubeMX or STM32CubeMX2 project
To import an STM32CubeMX project use the STM32 project wizard and follow the steps below:
Select the [[File]> [STM32 Project Create/Import]>[Import STM32 Project]] menu command. The wizard is illustrated in Figure 10
Select STM32CubeMX or STM32CubeMX2 project
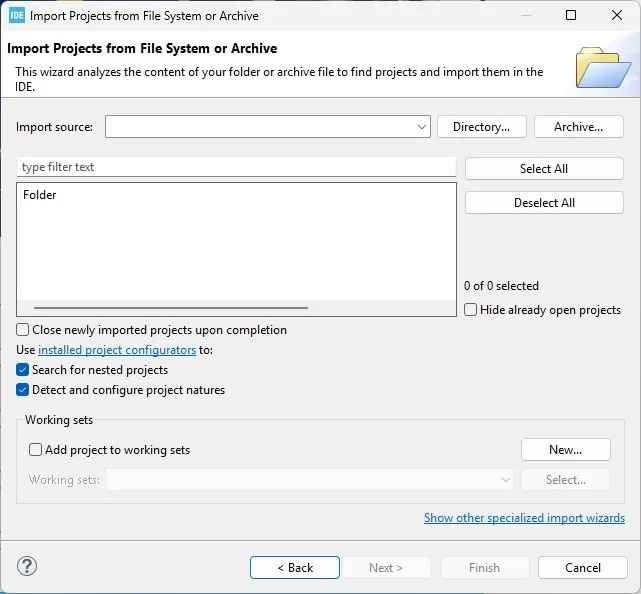
Follow the wizard instructions displayed to enter the requested data:
– Project name
– STM32CubeMX directory location. Illustrated in Figure 11.
Click on [Finish].
Figure 10. Import existing STM32CubeMX project wizard
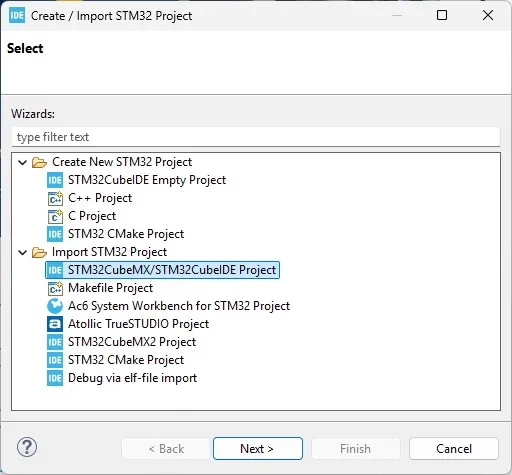
Figure 11. Import project from file system
New projects can also be created through [[File]>[ Import STM32 Project]> STM32CubeMX/STM32CubeIDE] menu command.
Start from existing project: Import STM32CubeMX2 or STM32CubeIDE project
To import an STM32CubeMX2 project use the STM32 project wizard and follow the steps below:
Select the [[File]> [STM32 Project Create/Import]> [Import STM32 Project]] menu command. Illustrated in Figure 12.
Select STM32CubeMX2 project.
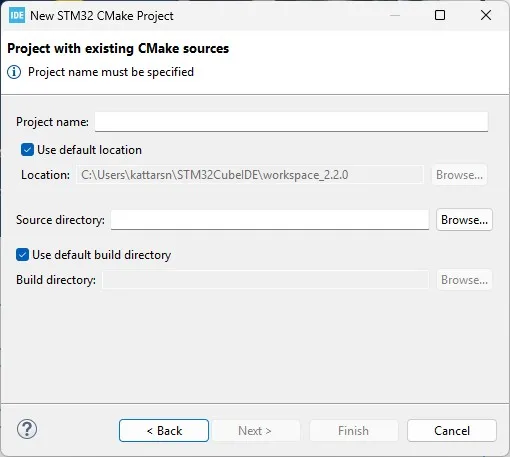
Follow the wizard displayed to enter the requested data, as illustrated in Figure 13:
• Project name
• STM32CubeMX2 directory.
Click on [Finish].
Figure 12. Import STM32CubeMX2 project wizard
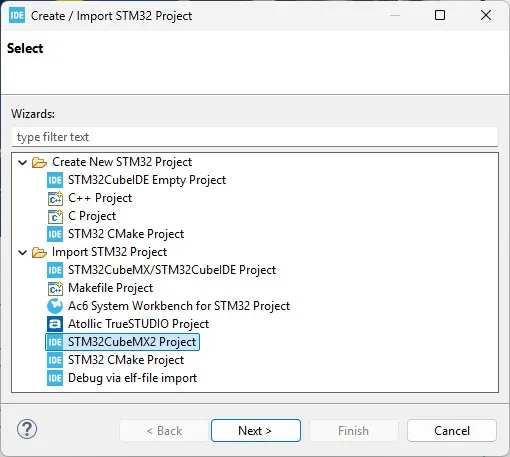
Figure 13. Project used with existing CMake source wizard
New projects can be created as well through [[File]>[ Import STM32 Project]> STM32CubeMX2] project menu command.
Project importing can also be initiated through the added icon in the toolbar illustrated in Figure 14.
Figure 14. Project import icon

Please refer to the following links for an initiation with STM32CubeIDE