
 STM32CubeMX2

How to use STM32CubeMX2 in offline mode 
STM32CubeMX2 can run in offline mode without an internet connection. It works almost the same way as in online mode, with slight differences.
Offline mode limitations 
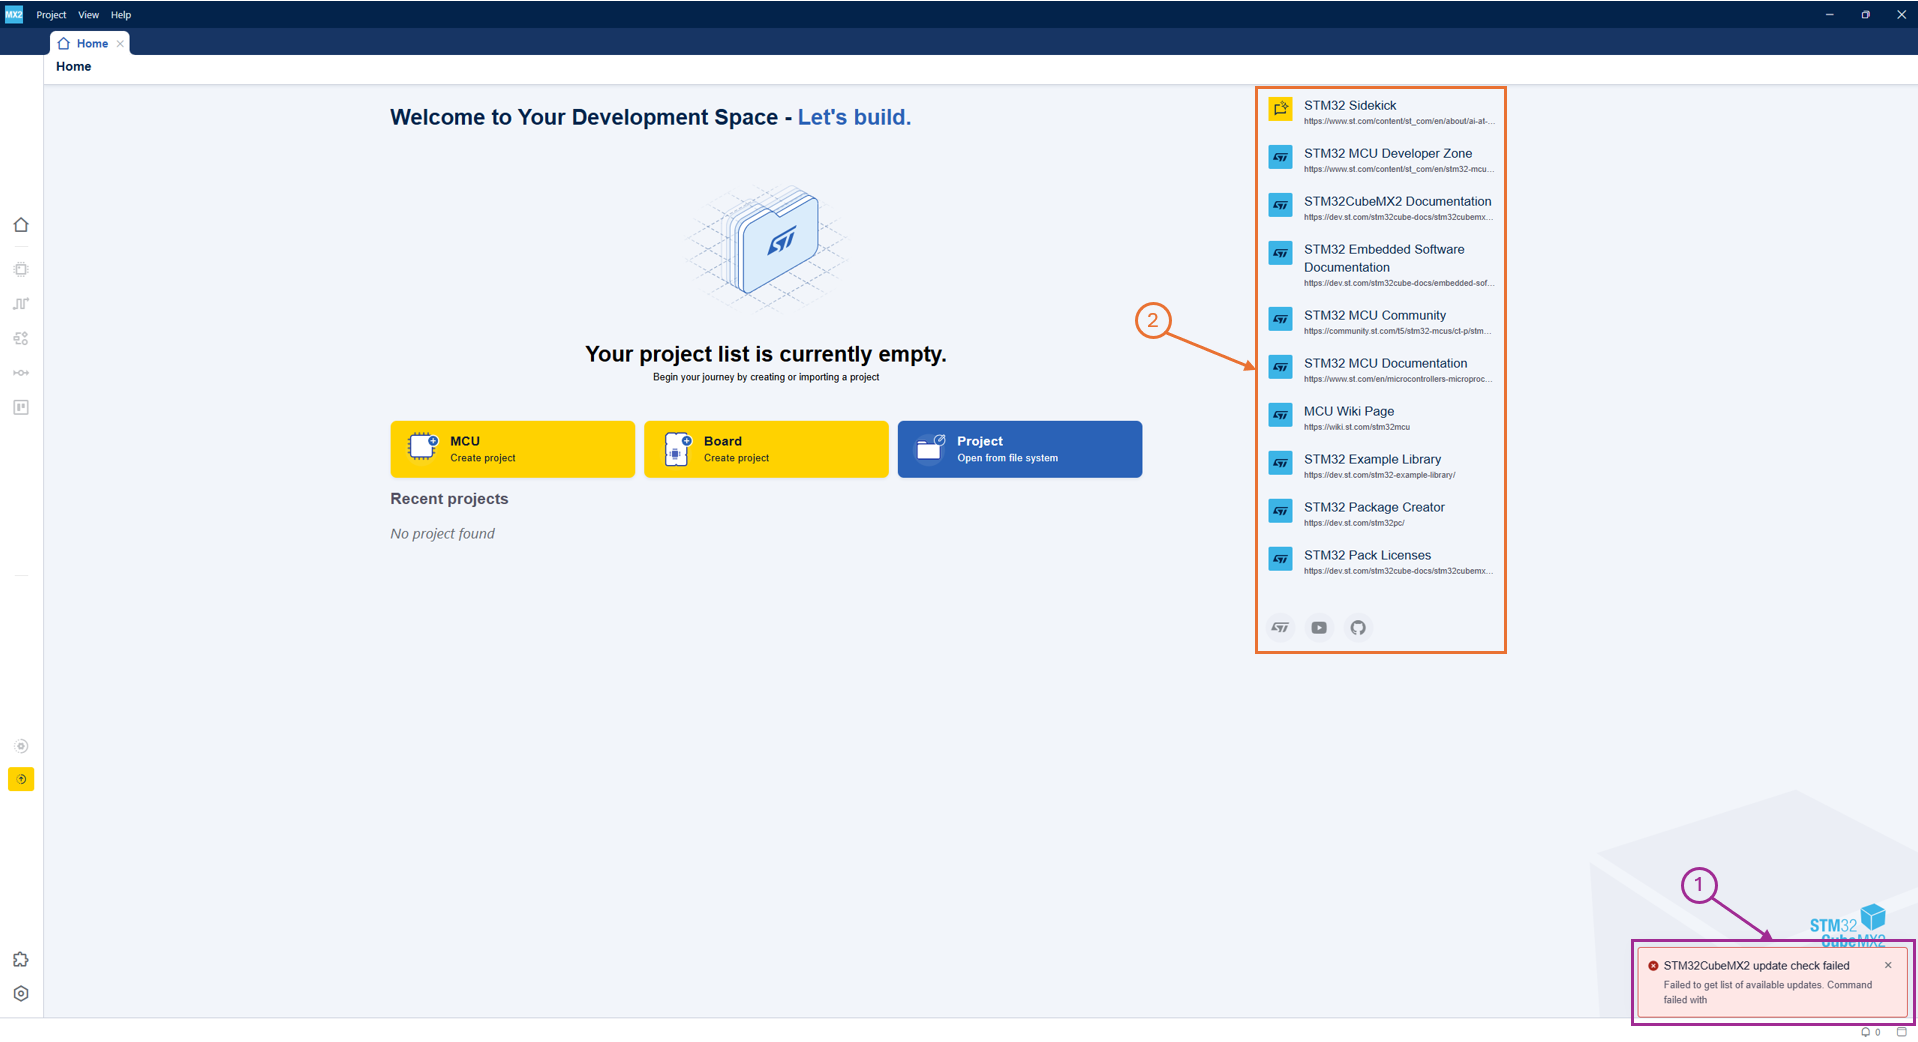
The STM32CubeMX2 update feature is not available in offline mode. STM32CubeMX2 can be updated only when the computer is connected to the internet (1).
All documentation links on the STM32CubeMX2 home page are not available in offline mode. The documentation can be accessed only when the computer is connected to the internet (2).
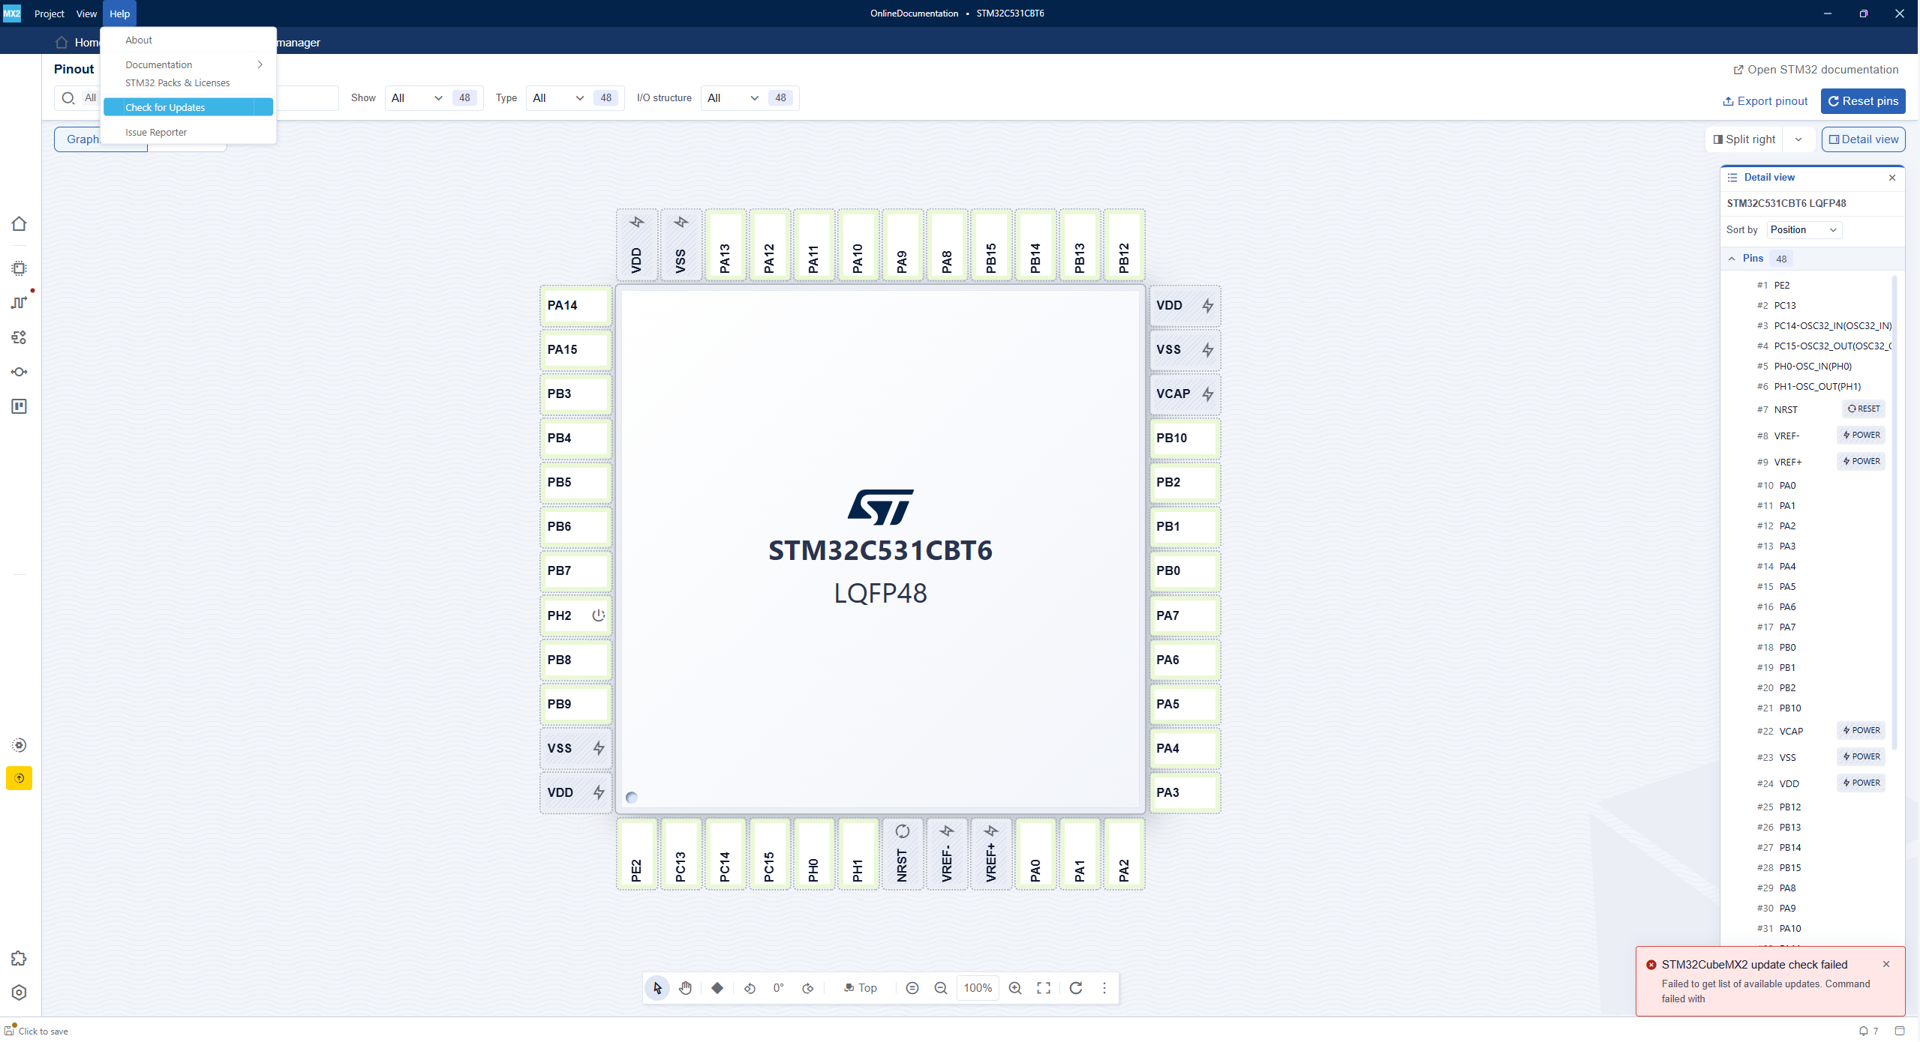
“Check for Updates” in the Help menu is not available in offline mode. Updates can be checked only when the computer is connected to the internet.
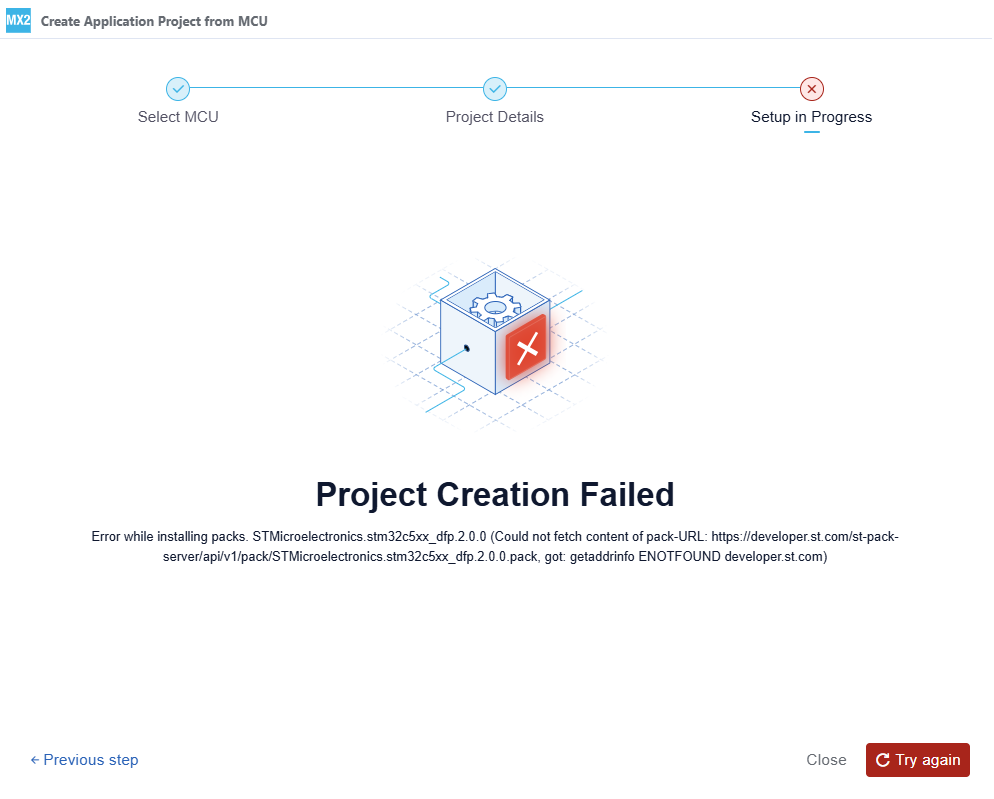
A project cannot be created if the required packs are not installed. A project can be created only if the required packs are already installed on the computer.
STM32CubeMX2 is delivered without any packs. Packs cannot be downloaded from the STM32CubeMX2 interface, and installed packs cannot be updated in offline mode.
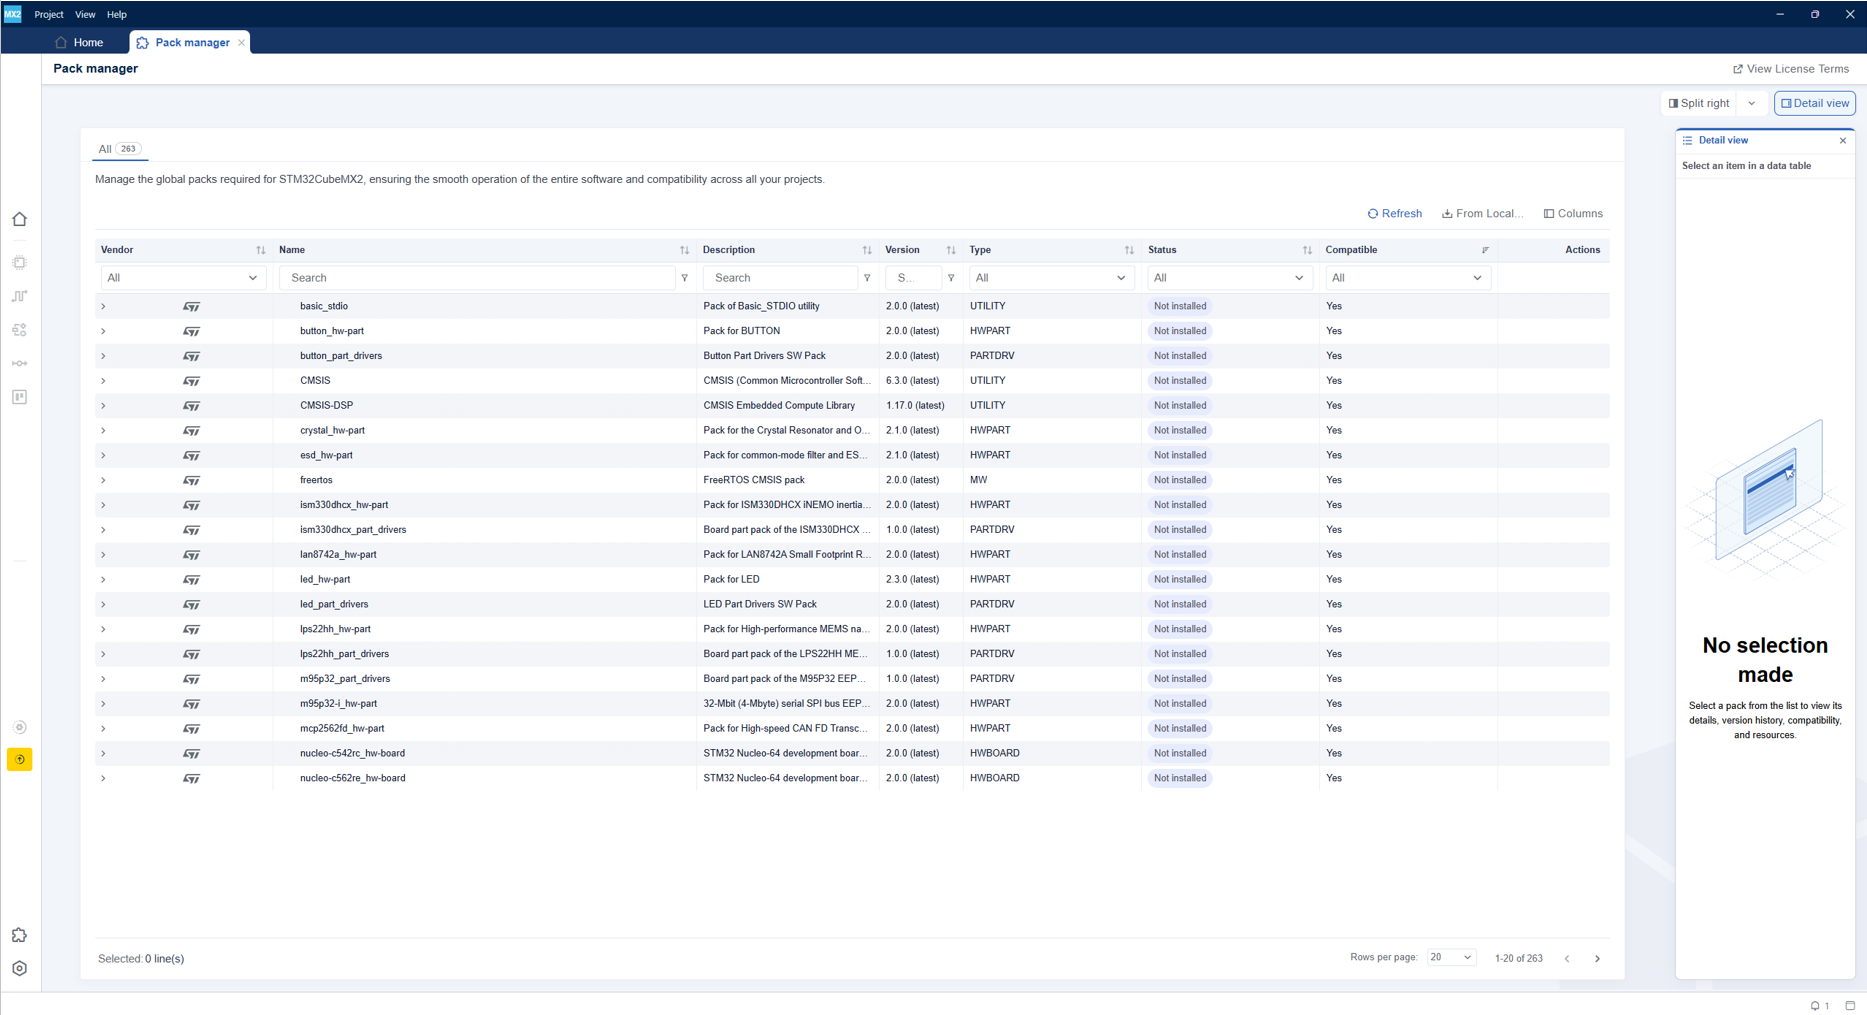
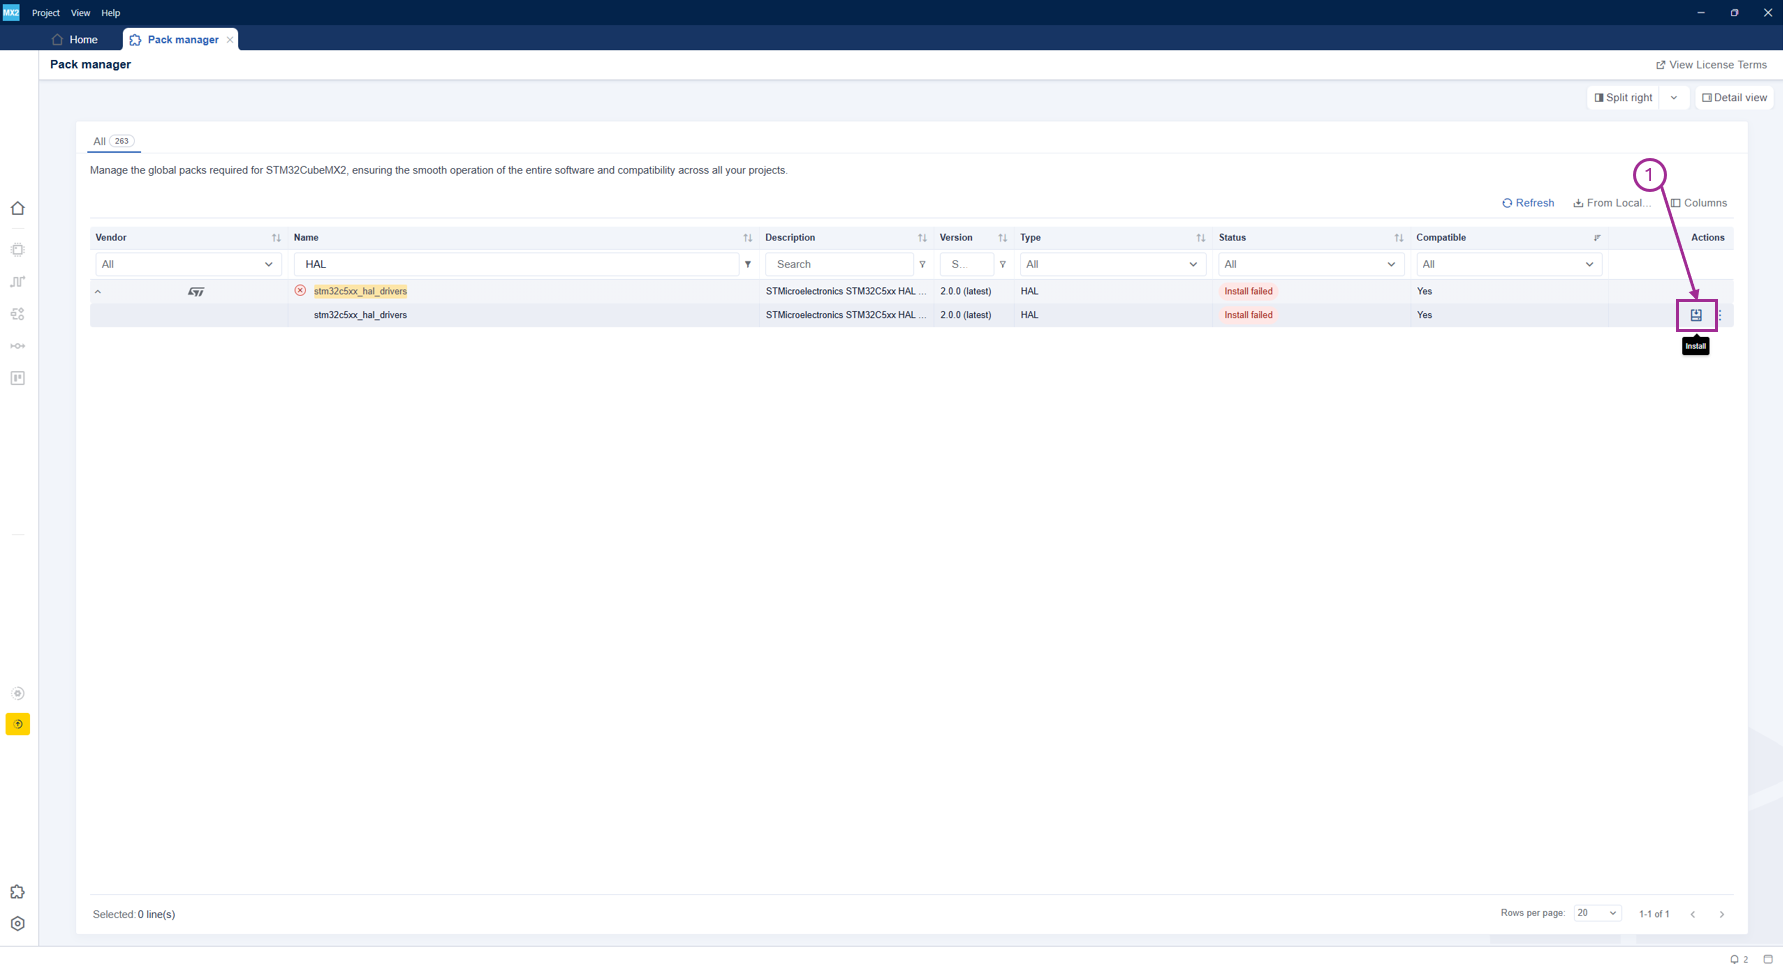
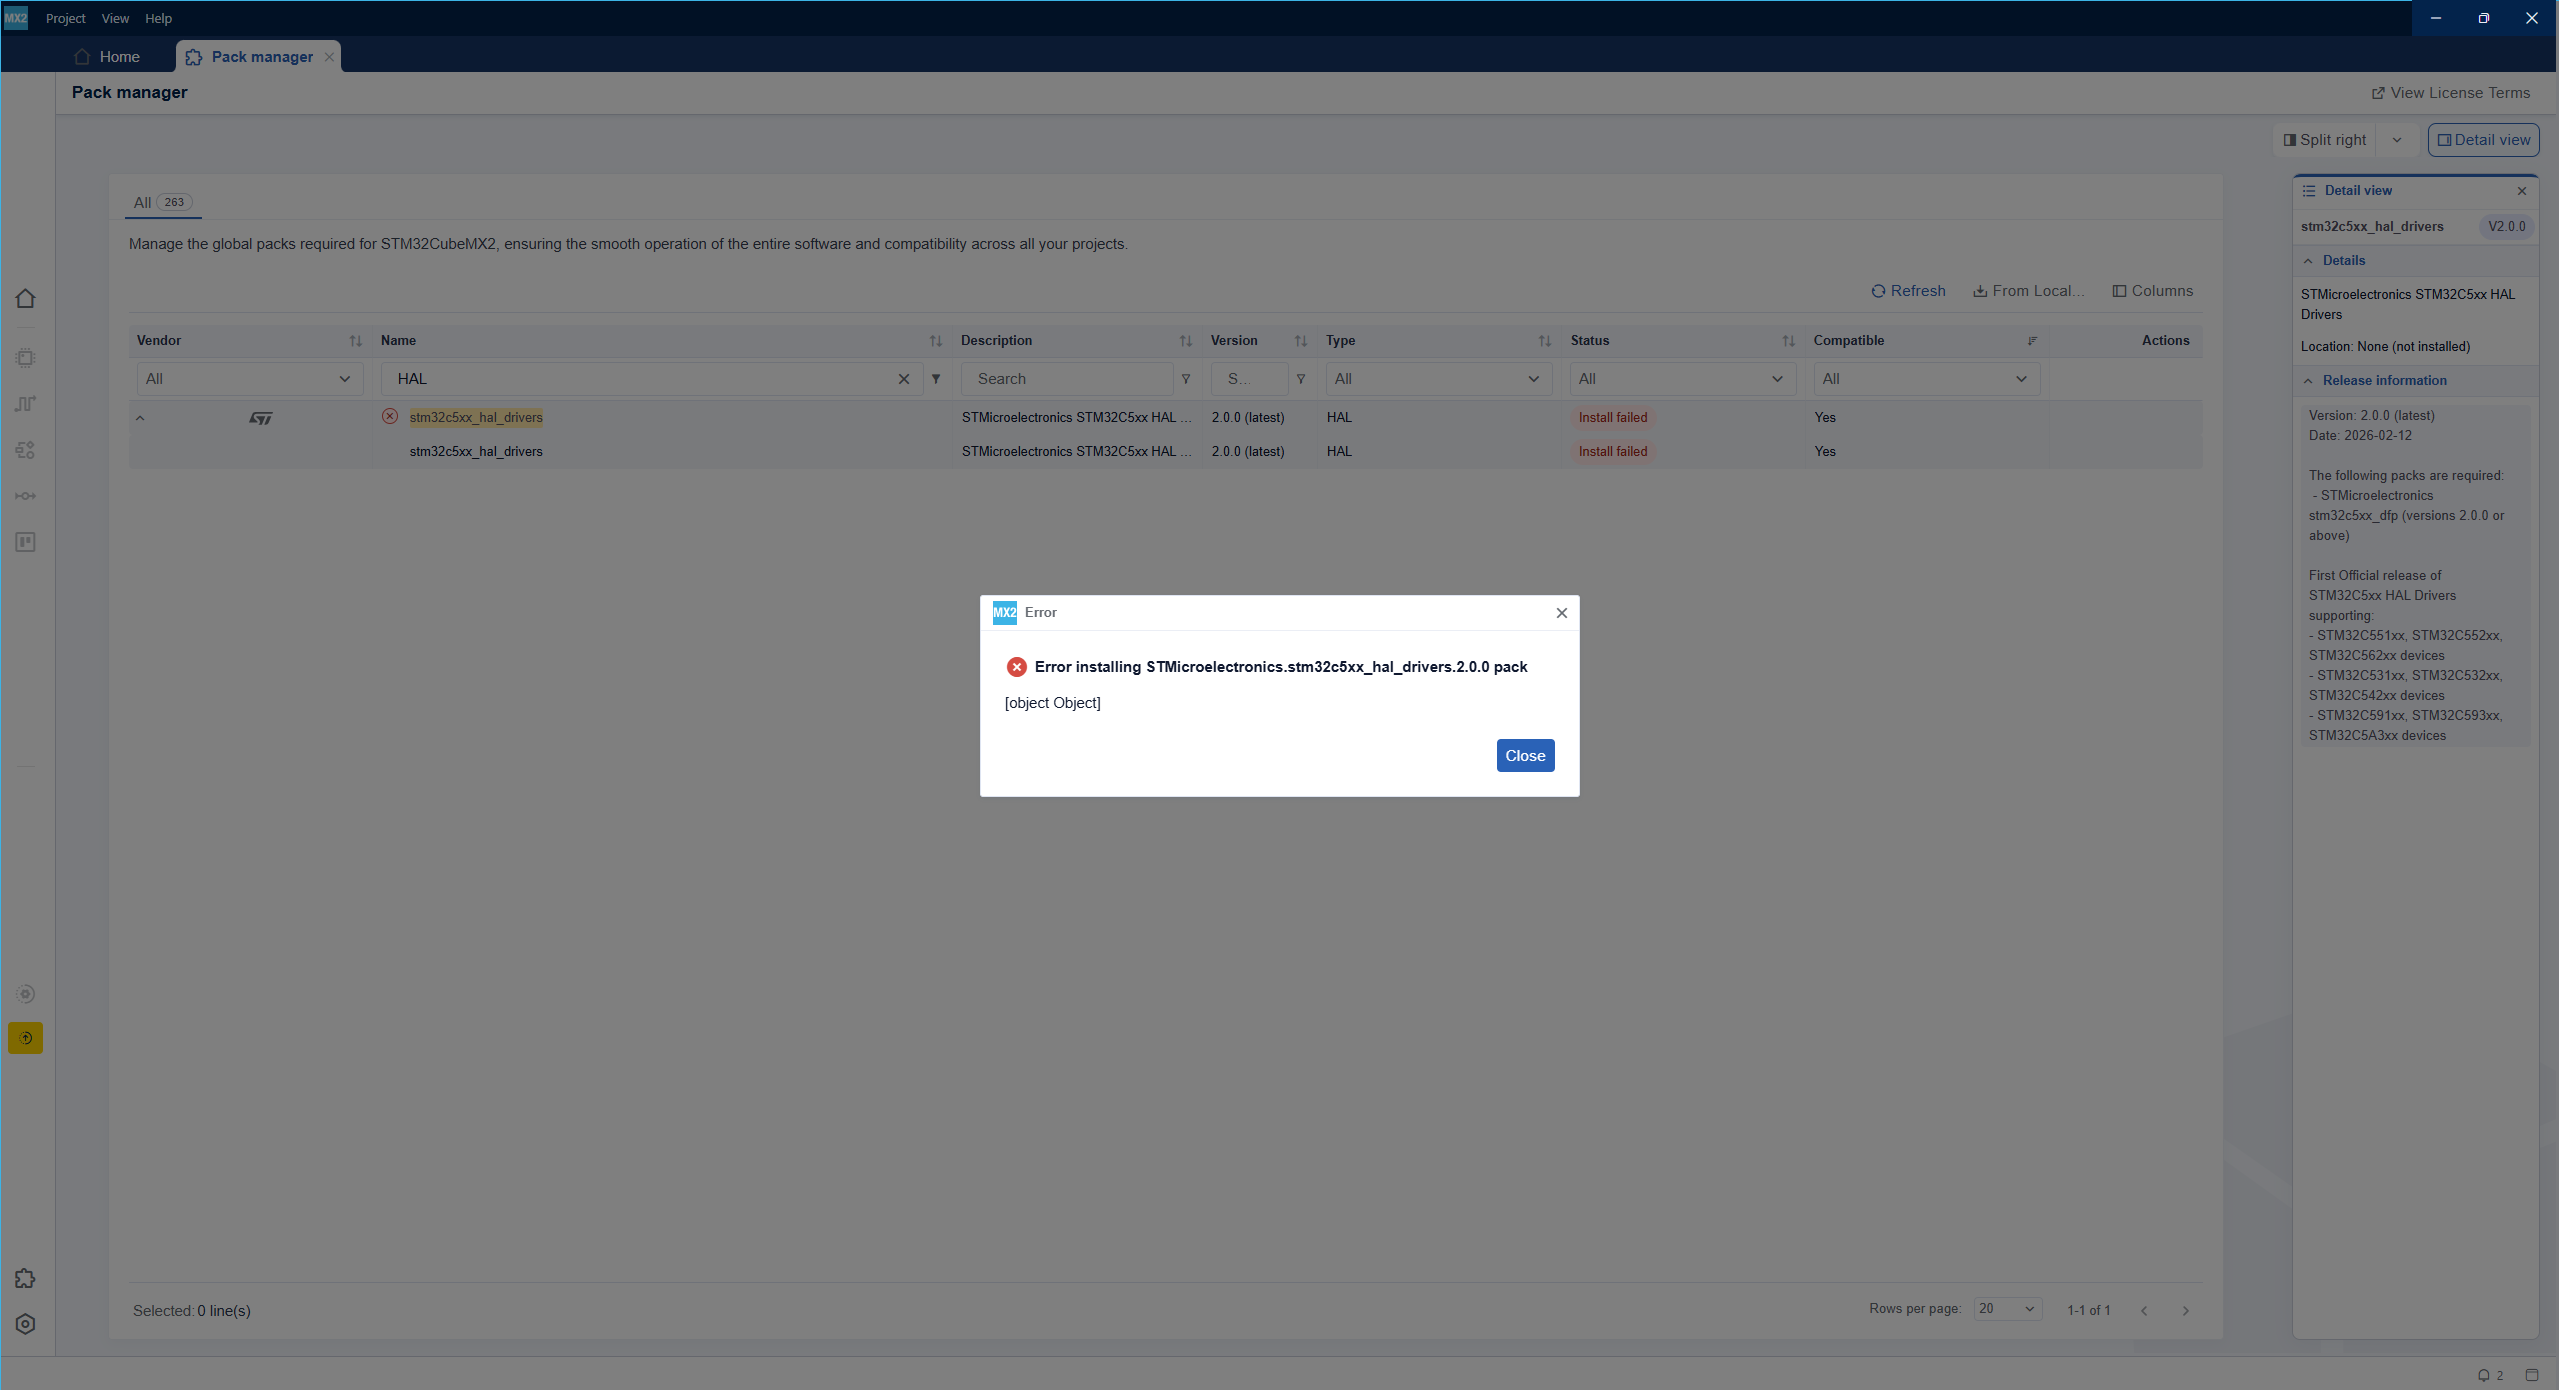
Trying to install a pack with the “Install” button (1) in the Pack Manager raises an error in offline mode.
Prepare material for offline use 
First, install STM32CubeMX2 on the computer. The installer can be downloaded from the STM32CubeMX2 page at https://www.st.com/en/development-tools/stm32cubemx.html, obtained by command-line interface (CLI), or copied from a USB flash drive.
Download the required packs from STM32 Package Creator here: https://dev.st.com/stm32pc/. The packs can be downloaded on a computer with internet access and then copied to the offline computer, or copied from a USB flash drive.
Install packs in offline mode 
Use the Install Package feature in the Pack Manager:
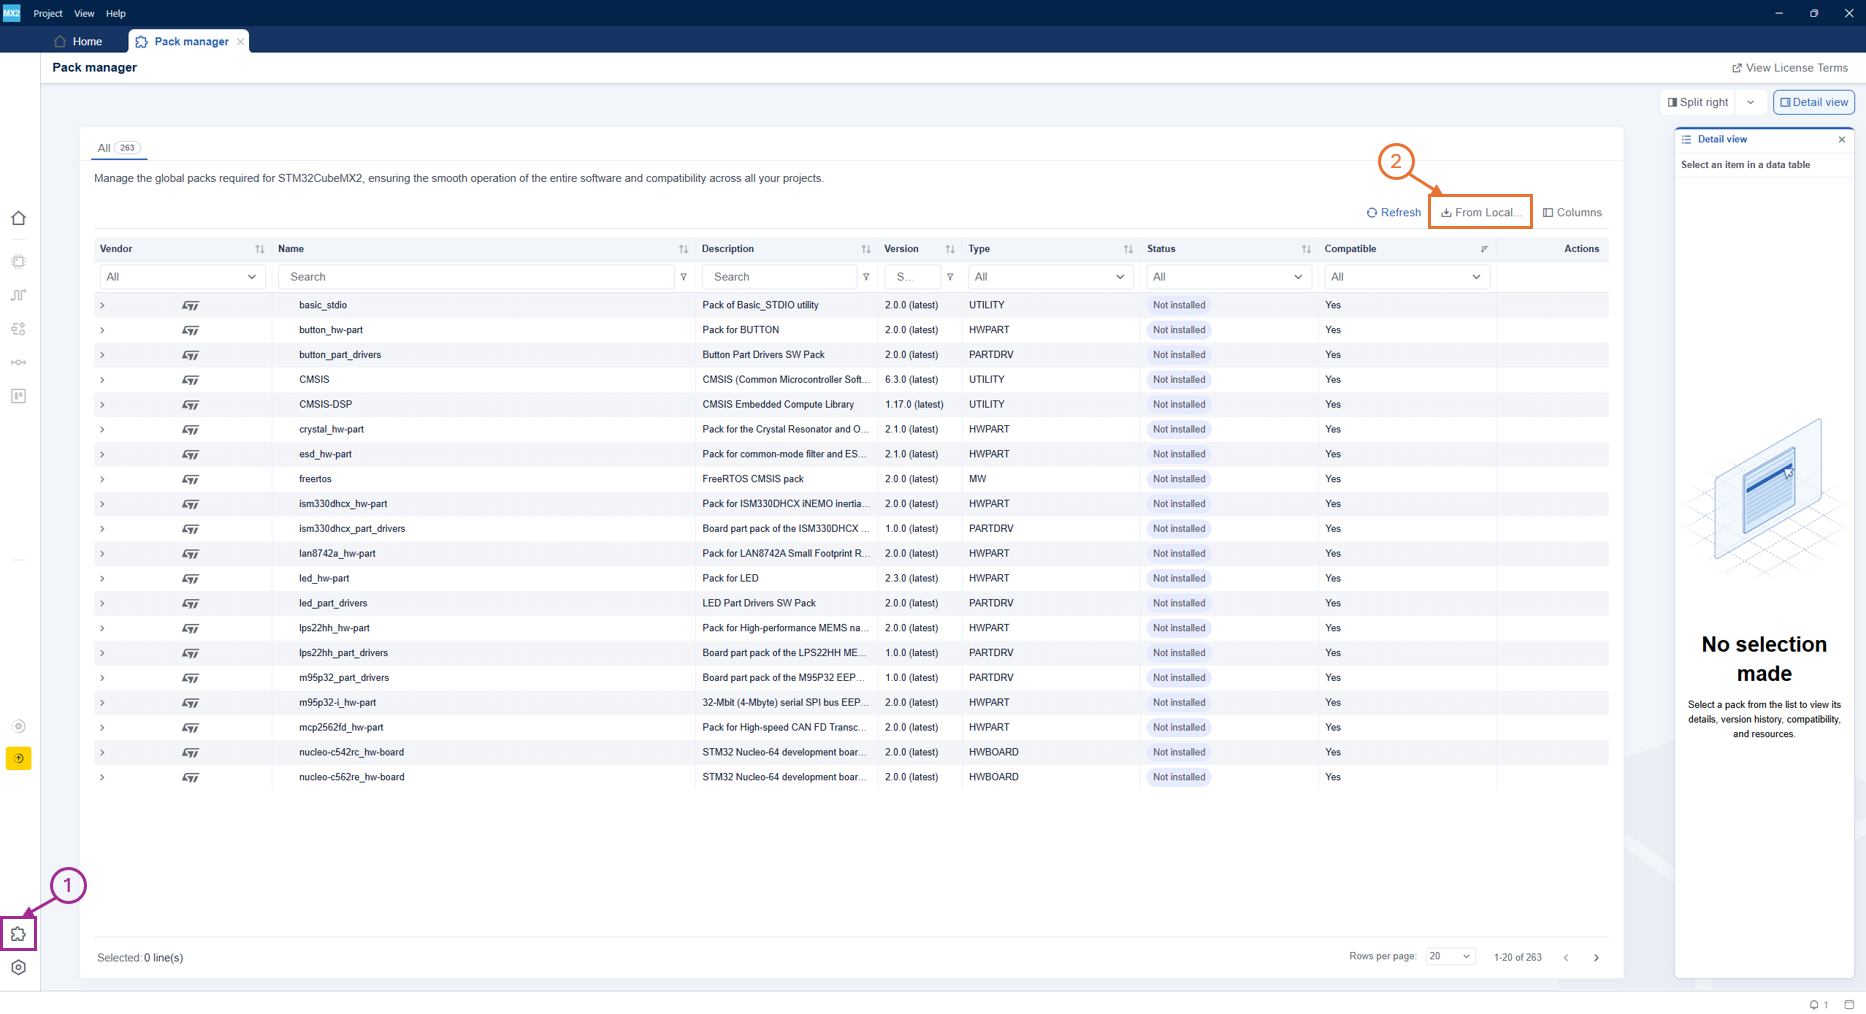
In the left bar, open Pack Manager (1).
Click “From Local…” (2) to search for the packs that were downloaded and copied to the offline computer.
- Select the packs to install:
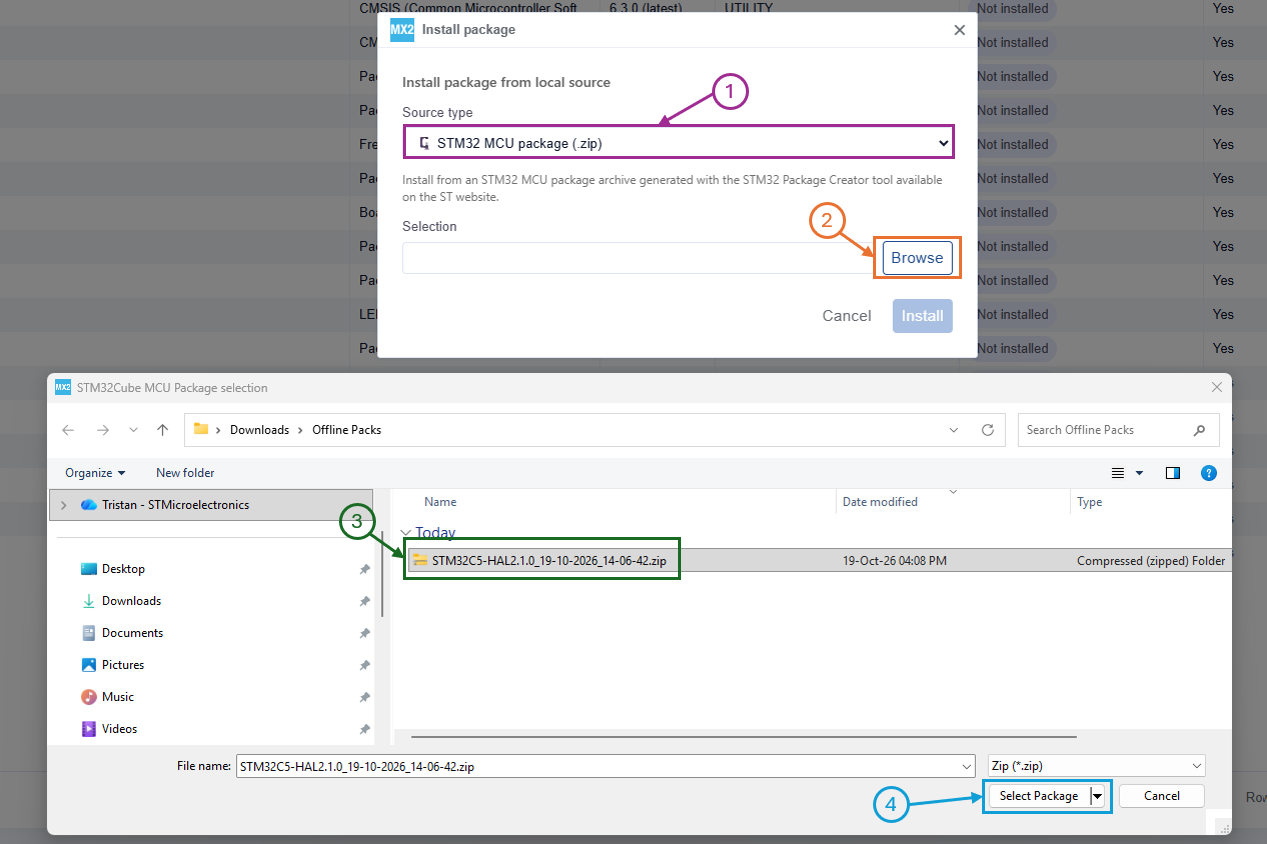
Select the source type “STM32 MCU package (.zip)” (1).
Click “Browse” (2) to select the folder where the packs were copied.
Find the packs to install in the file system (3).
Click “Select Package” (4) to install the packs.
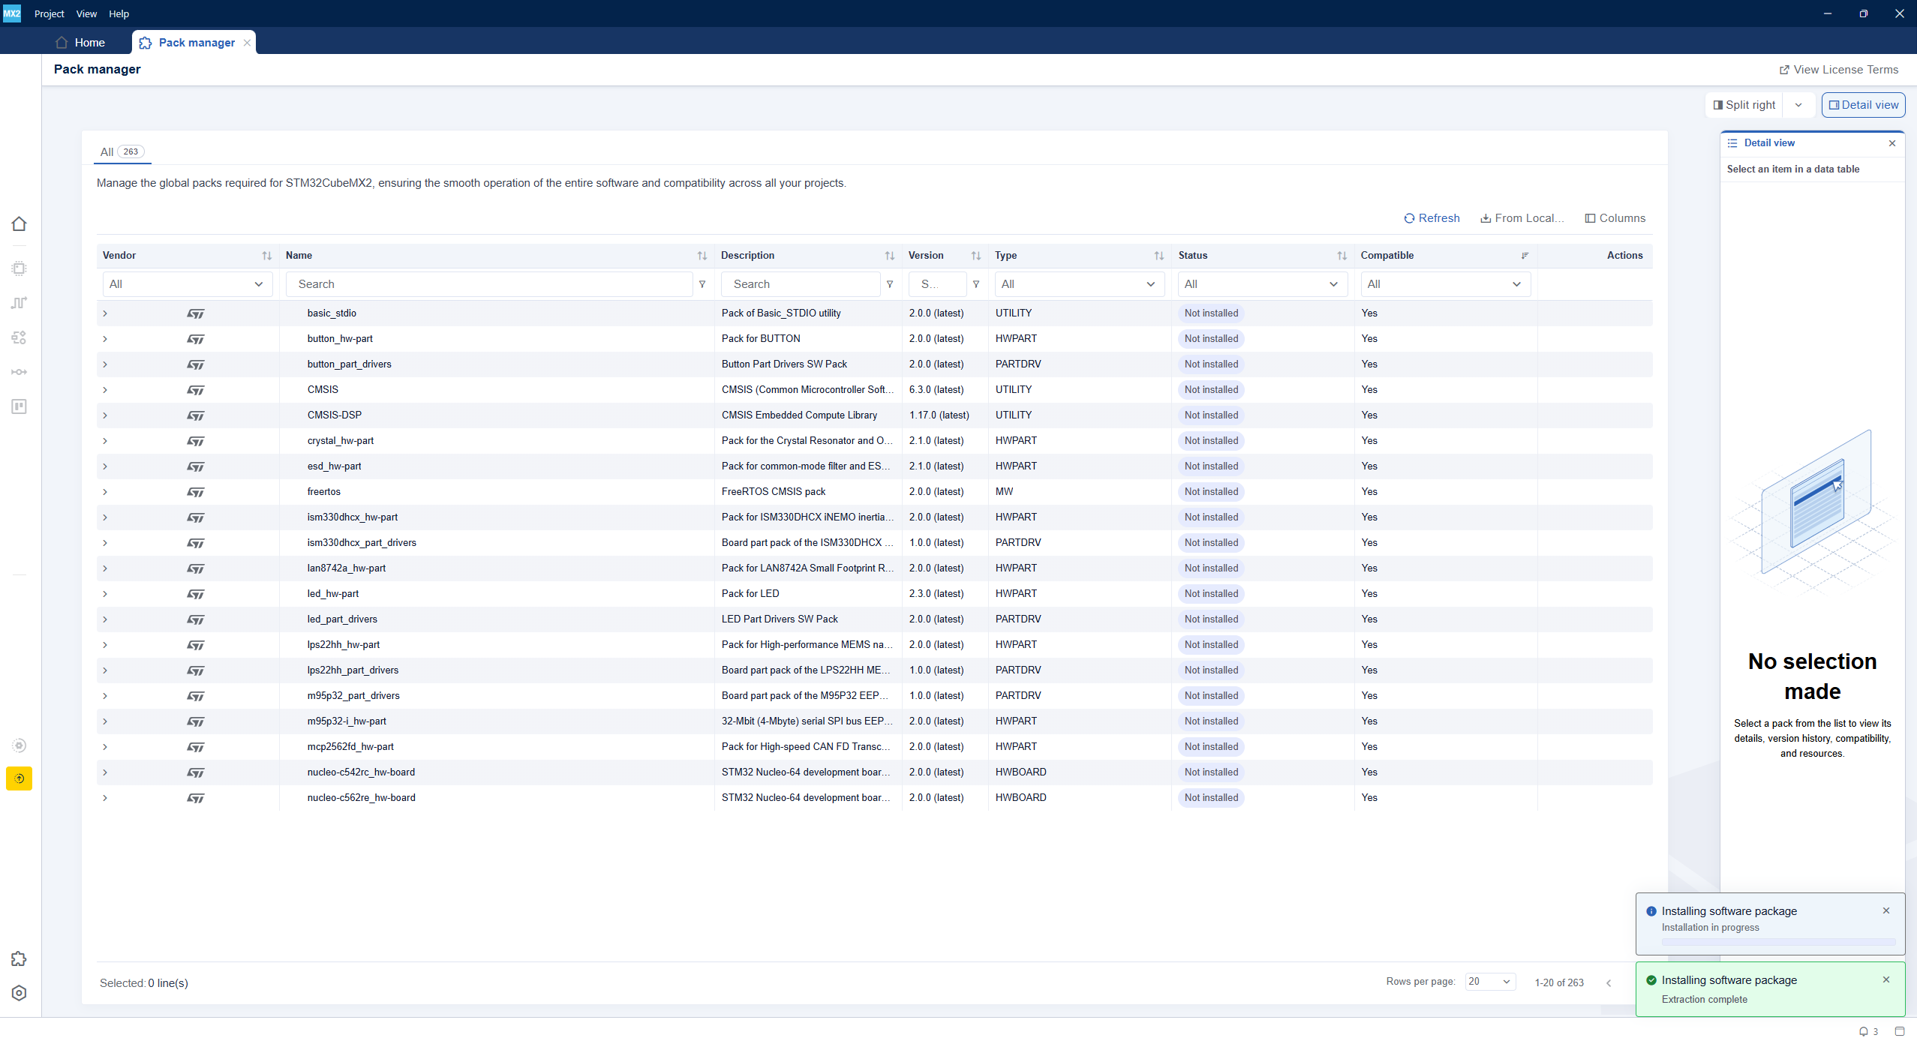
Wait until the software package is extracted and the packs are installed:
First, the software package is extracted.
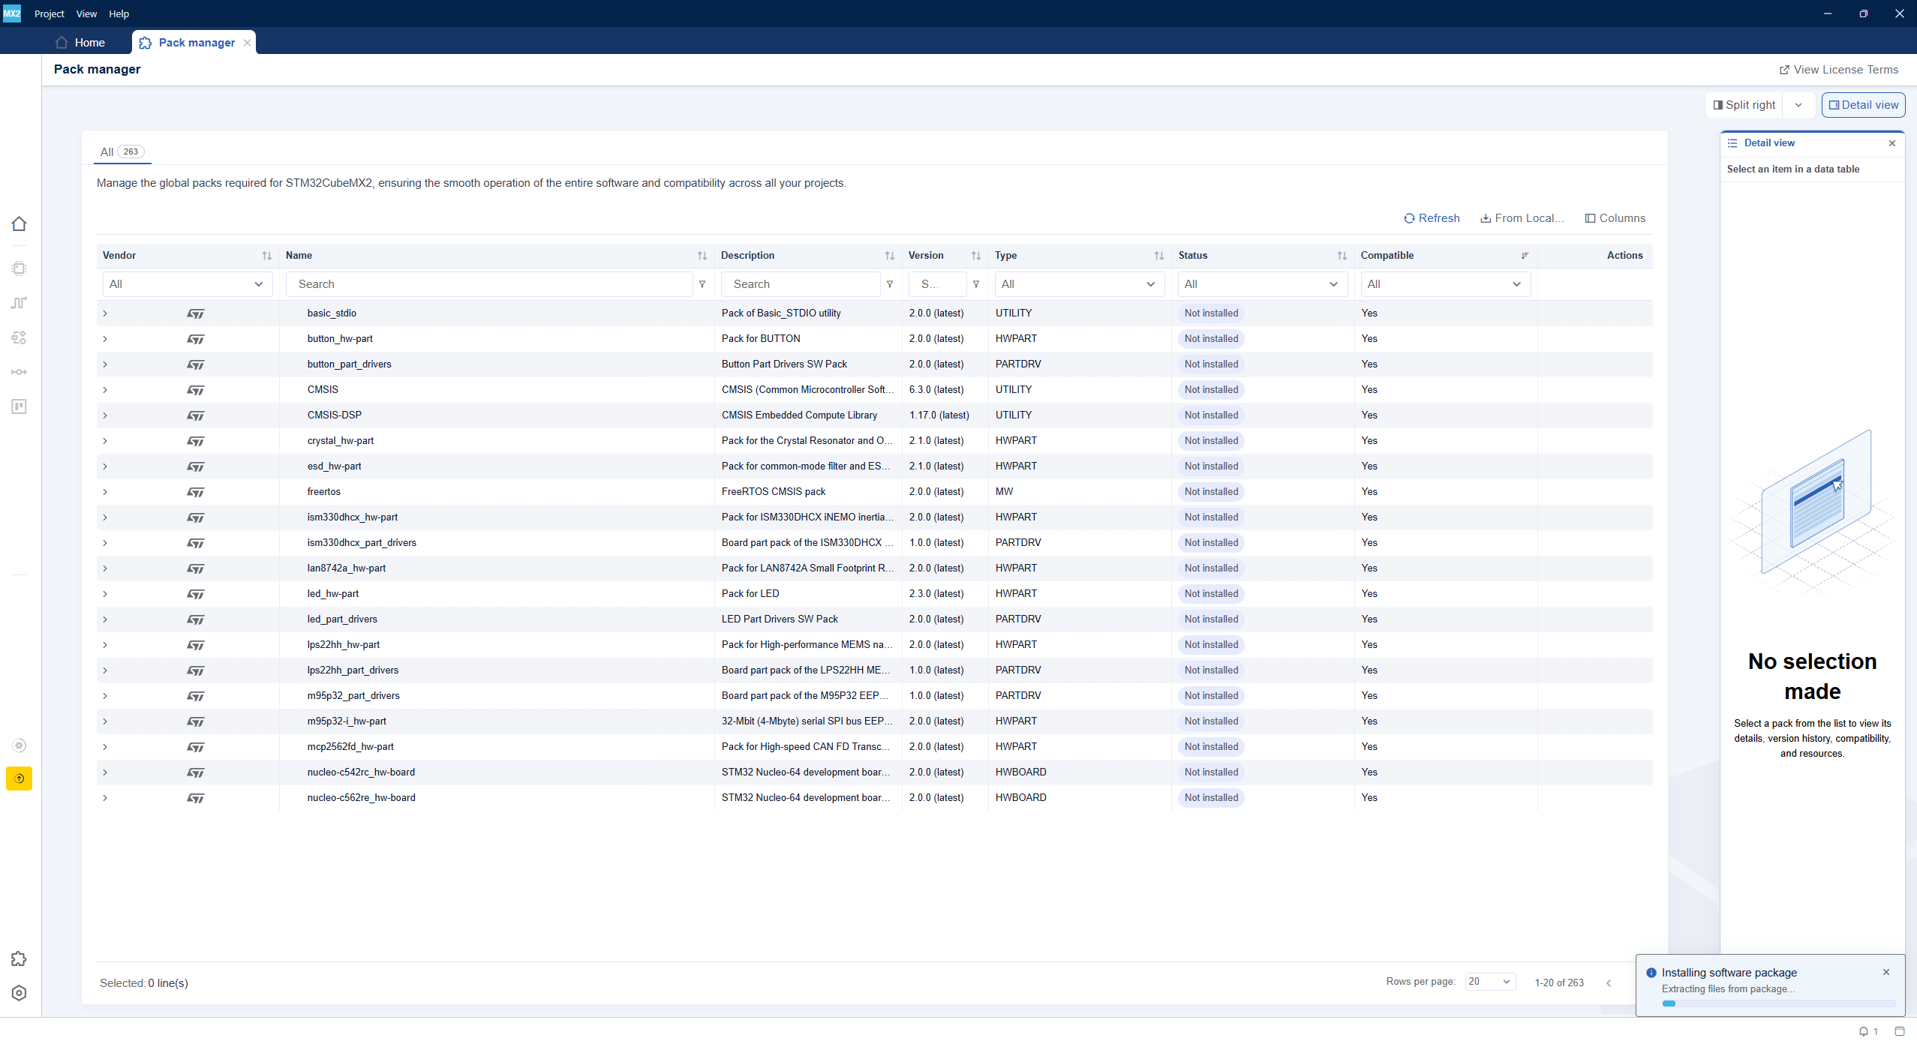
Then, after successful extraction, the packs are installed.
Finally, a message confirms that the packs were installed successfully, and the individual pack statuses in the Pack Manager are updated to “Up to date”.
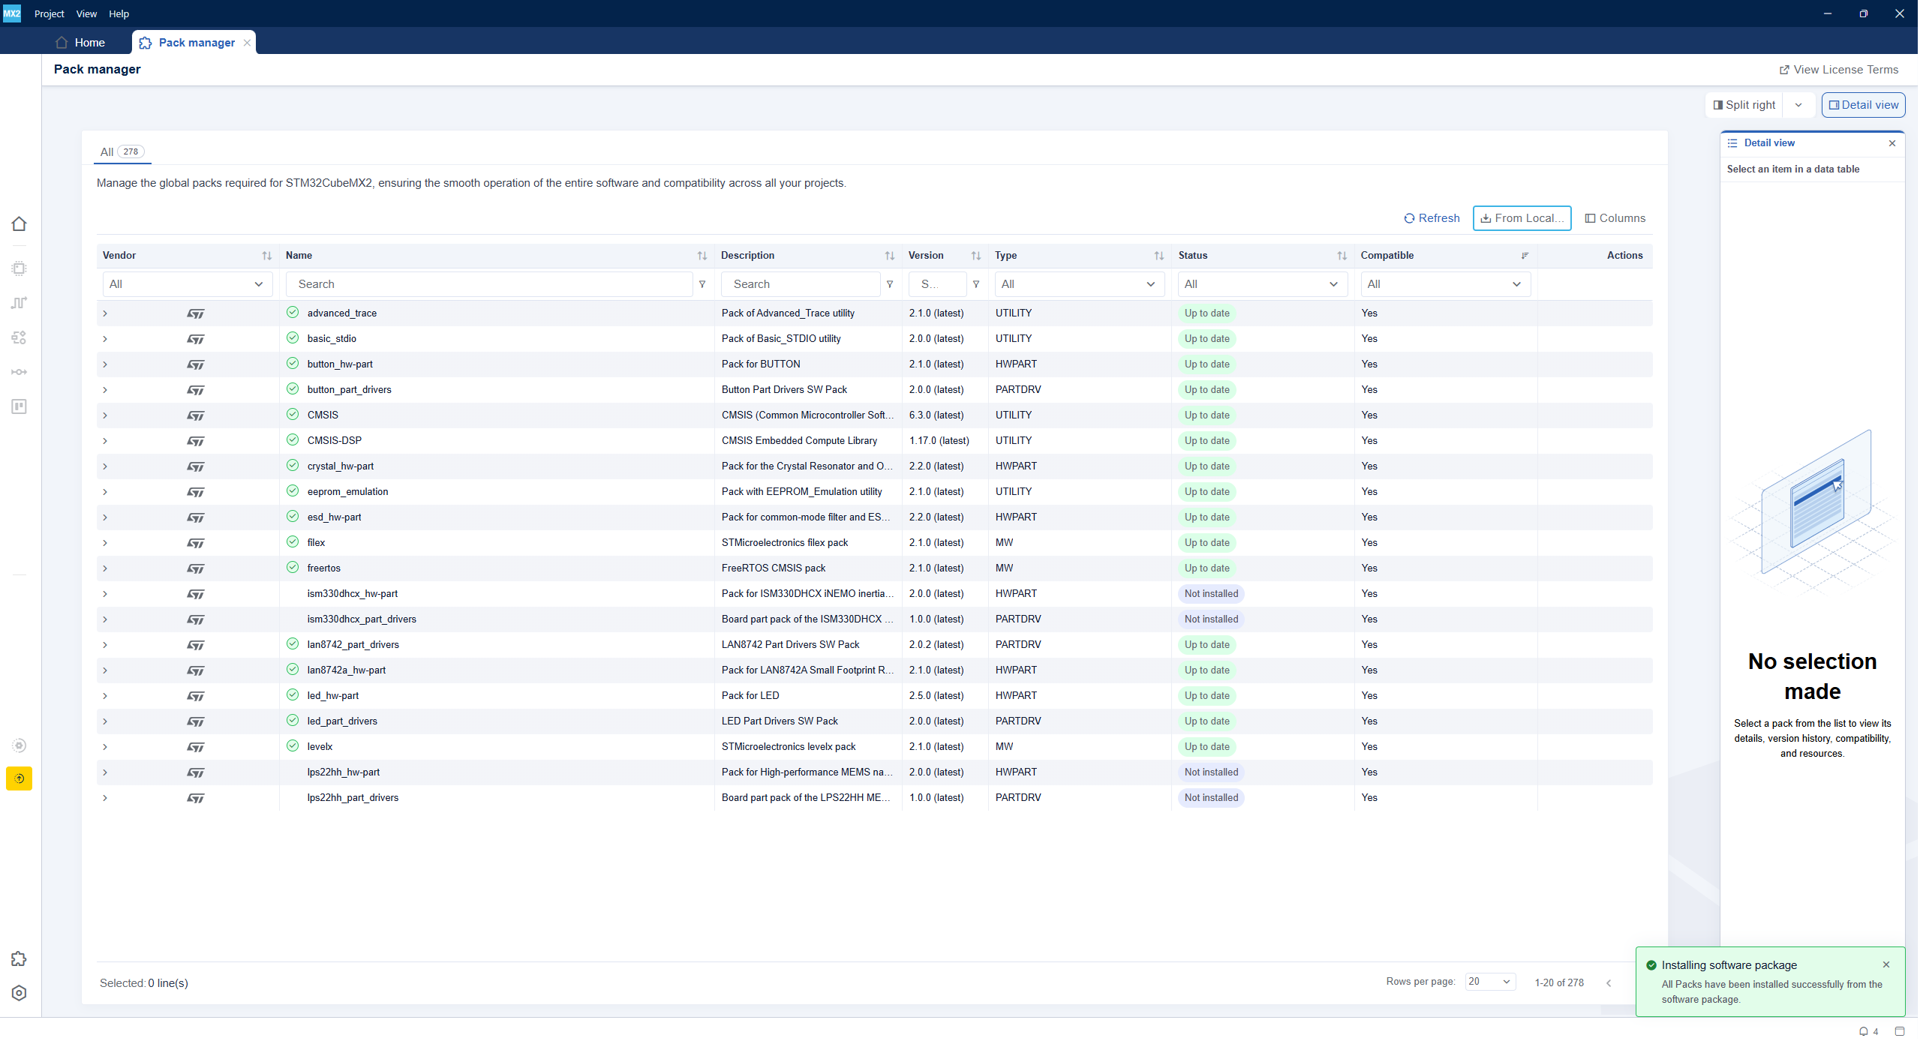
Project creation can then resume, and it works exactly as in online mode.