
Installation 
Installation process 
Whitelist of executables 
The following executables must be whitelisted to ensure proper functioning of STM32CubeMX2 :
stm32cubemx2.exe
cube.exe
cube-cmsis-scanner.exe
node.exe
csolution.exe
project_extractor.exe
Installation prerequisites for special characters 
On some systems, STM32CubeMX2 may encounter issues if project or working paths contain user profile folders with non-ASCII characters, such as accented characters or non-Latin scripts in the Windows account name or in the STM32CubeMX2 project name.
Workaround: Enable “Use Unicode UTF-8 for worldwide language support” 
Note
To resolve this issue for Windows11, enable the following Windows setting:
In Settings go to Time & language > Language & region
Activate “Beta: Use Unicode UTF-8 for worldwide language support,” then restart Windows.
Impacted characters 
This workaround is especially relevant if your Windows user account name (
C:\Users\<AccountName>) or an
STM32CubeMX2
project name contains:
Accented or diacritic characters (for example, é, è, ä, ö, ü, ñ, ç, ą, ę, ł, ś, ž,…).
Non-Latin scripts (for example, Greek, Cyrillic, Chinese, Japanese, Korean, Arabic).
If your account name uses only unaccented Latin letters (A–Z, a–z), digits (0–9), underscore (
_) or dash (
-), this issue is unlikely to occur.
Potential side effects 
Enabling this option changes the system ANSI code page to UTF-8. Most modern applications work correctly with this configuration. However, certain older non-Unicode applications that rely on legacy code pages may:
Display garbled or incorrect characters,
Misinterpret characters in filenames or configuration files, or
Encounter problems with text import or export.
If such issues occur, disable this option.
Windows 10 and Windows 11 support 
This setting is available on Windows 10 (version 1903 and later) and Windows 11. It is disabled by default. Users may enable this configuration if necessary to resolve encoding issues with STM32CubeMX2 .
Install on Windows 
Following these steps initiates the installation process for STM32CubeMX2. Proceed with the installation by following the on-screen instructions:
From GUI installer 
Open file explorer and navigate to the directory where the GUI installer file is located.
Double-click on the stm32cubemx2-[x]-X64-Windows-installer.exe file to launch the installation wizard.
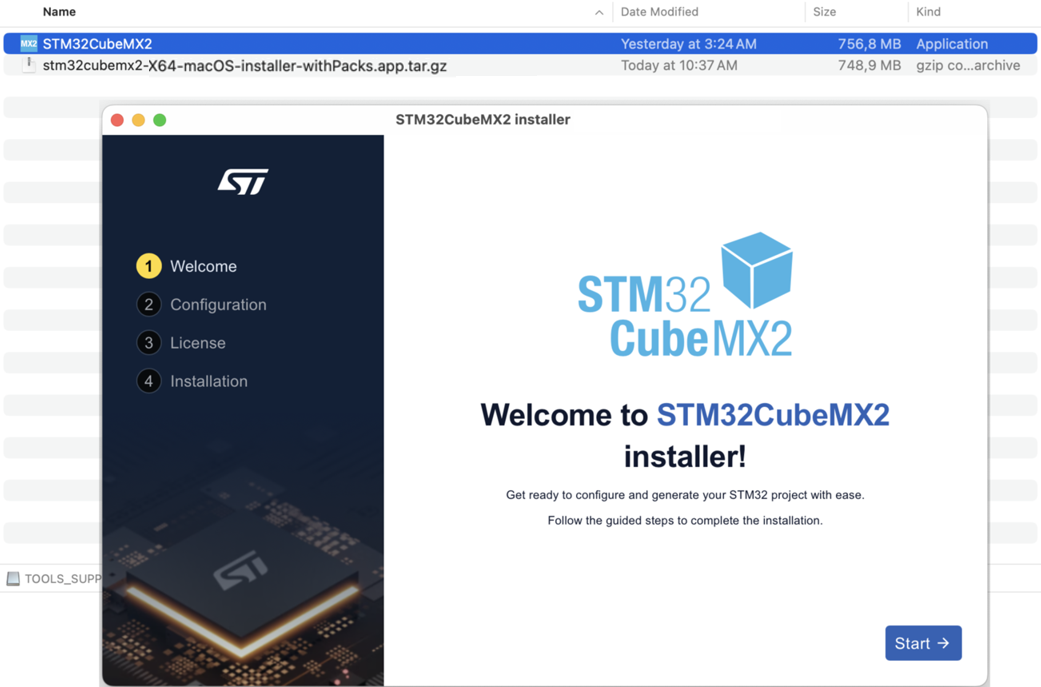
Click the Start button to begin the installation process (1).
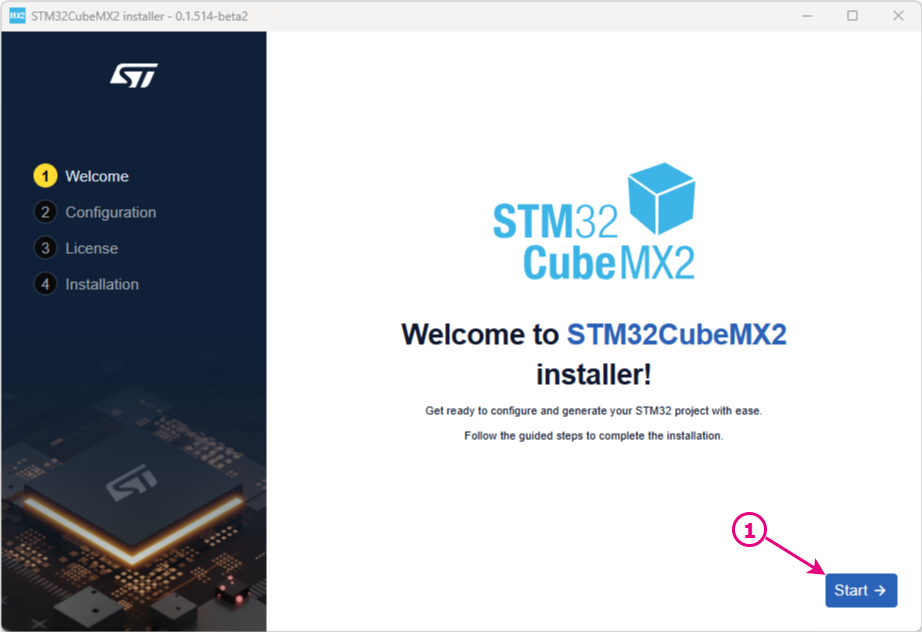
STM32CubeMX2 installer on Windows - welcome screen 
Ensure that there is enough disk space available.
Change the installation directory if needed. Click the change button and select a different path. The default path is: ‘C:\Users\<mylogin>\AppData\Local\STMicroelectronics\STM32CubeMX2’ (1).
Click the Back button, to go back to the previous step (2).
Click on Continue to proceed with the installation for the current user (3).
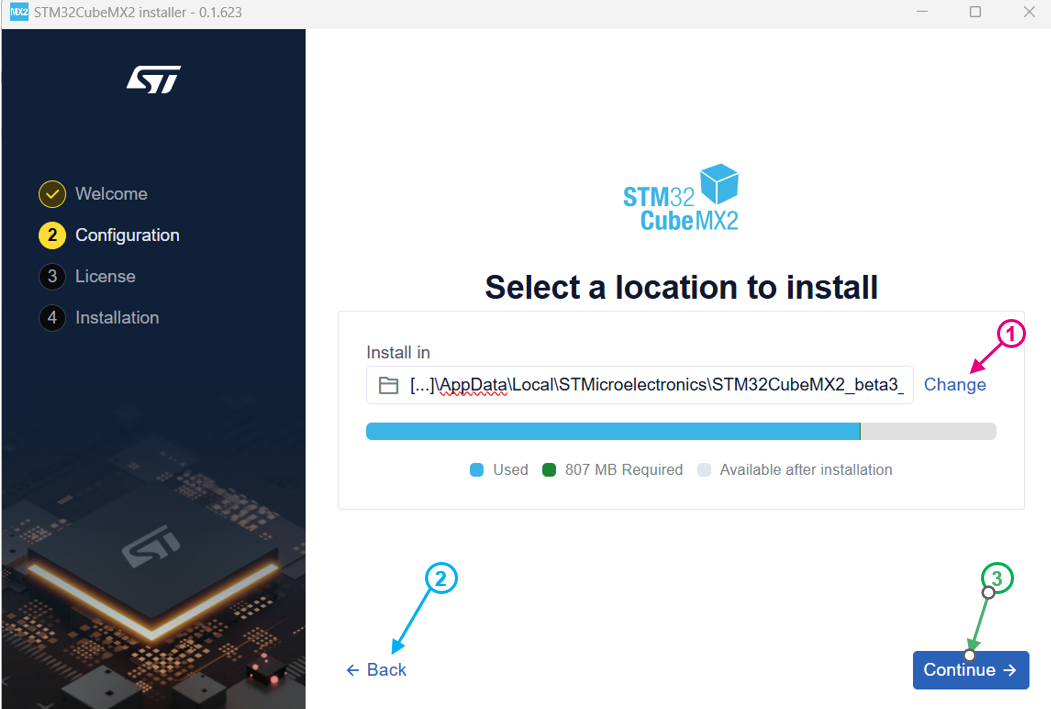
STM32CubeMX2 installer on Windows - installation location 
Read and accept the license terms Then click the Begin installation button to start the installation process.
During the installation, the progress screen provides real-time feedback on the status of the installation.
Once installation is complete, launch (2) the tool or close (1) the installer.
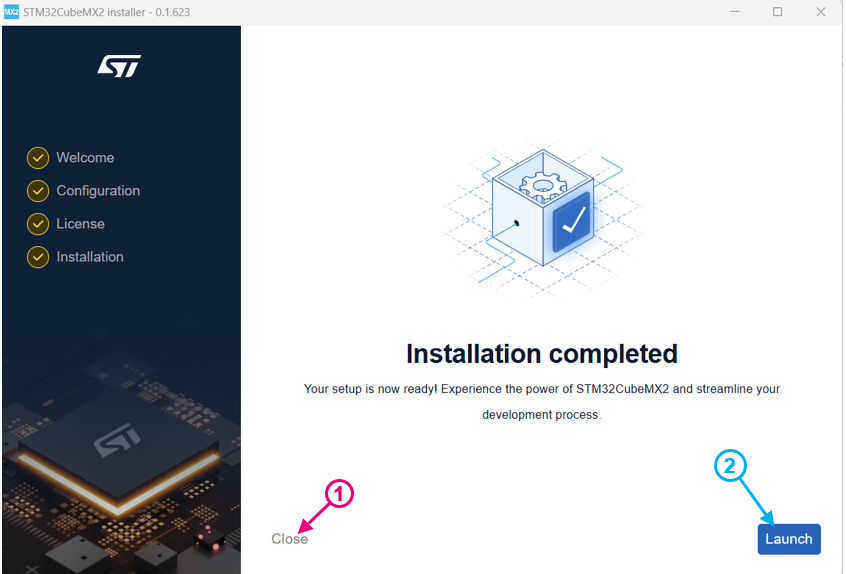
STM32CubeMX2 GUI installer on Windows - installation Complete 
Install on Linux 
To install STM32CubeMX2 on Linux:
From GUI installer 
Open a terminal and navigate to the installer path.
Type ./stm32cubemx2-[x]-X64-Linux-installer to launch the installer.
Follow the installation wizard as illustrated in the figures above.
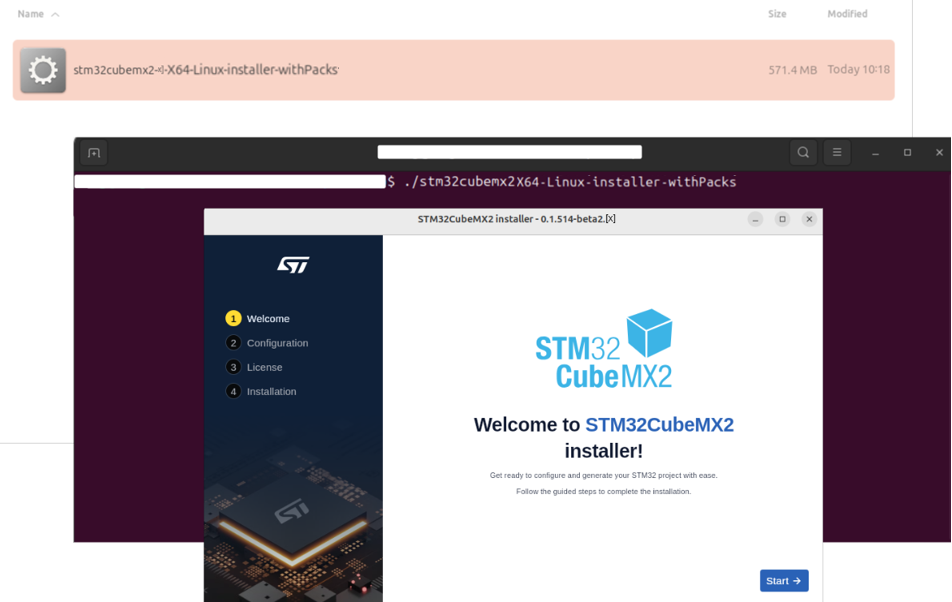
STM32CubeMX2 installer on Linux 
Note
- If you encounter a permission issue, type the following command to make the installer executable:
-
chmod +x stm32cubemx2-[x]-X64-Linux-installer
Note
- Users must install libwebkit2gtk-4.1-0 before launching the installer for Ubuntu 22.04.
-
sudo apt install libwebkit2gtk-4.1-0
Install on MacOS 
To install STM32CubeMX2 on MacOS:
From GUI installer 
Navigate to the GUI installer path.
Double-click stm32cubemx2-[x]-X64-macOS-installer.app.tar.gz to extract the tar.gz file.
Double-click the extracted app to start the installation process.
Follow the installation wizard .
STM32CubeMX2 installer on MacOS 
Installation Status and Error Handling 
If the installation does not complete with 100% success, an installation status summary is displayed. Depending on the reported error level, the installation may still be partially operational (for example if minor errors are shown).
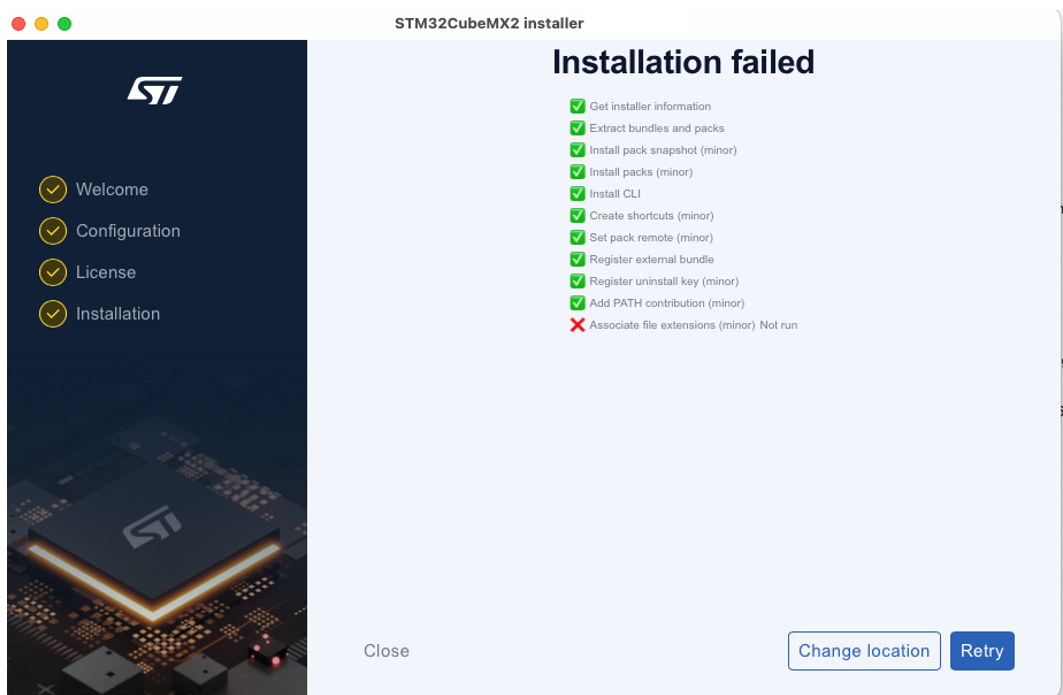
Installation status summary 
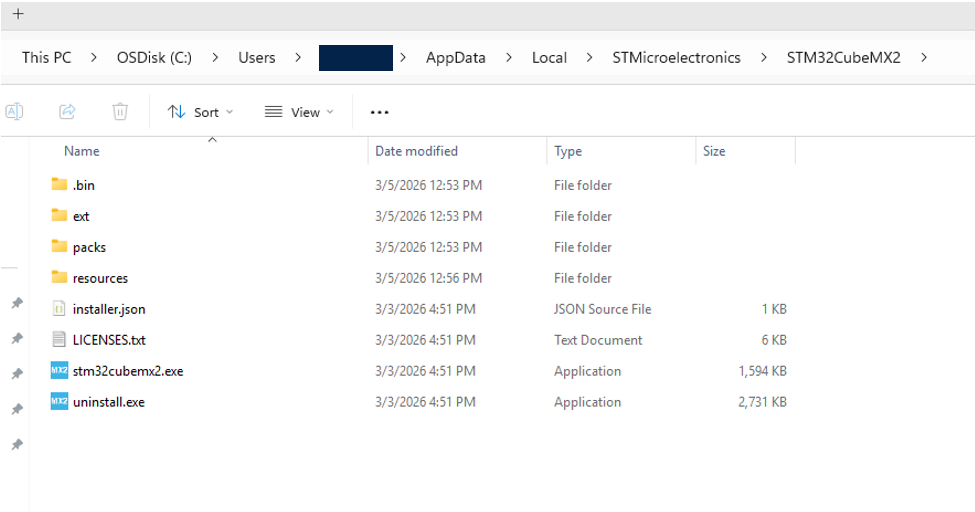
STM32CubeMX2 installation directory 
The following figure shows the contents of the default installation directory for STM32CubeMX2
Default path:
Windows: ‘C:\Users\<mylogin>\AppData\Local\STMicroelectronics\STM32CubeMX2’
Linux: ‘Home/.local/share/STMicroelectronics/STM32CubeMX2’
MacOS: ‘Users\<mylogin>\Library\Application Support\STMicroelectronics\STM32CubeMX2’
The installation directory is organized as follows (Windows example):
.bin: folder: A folder containing the cube.exe command.
ext: A folder containing CubeBundle.json to list the available CLI commands.
packs: contains the .Web folder which will be installed in the CMSIS_PACK_ROOT folder.
resources: A folder that contains the necessary resources for STM32CubeMX2.
installer.json: contains some info on the STM32CubeMX2 installer.
LICENSES.txt: A text document containing license information.
stm32cubemx2.exe: The executable file to launch STM32CubeMX2.
uninstall.exe: The executable file to uninstall STM32CubeMX2.
STM32CubeMX2 installation directory 
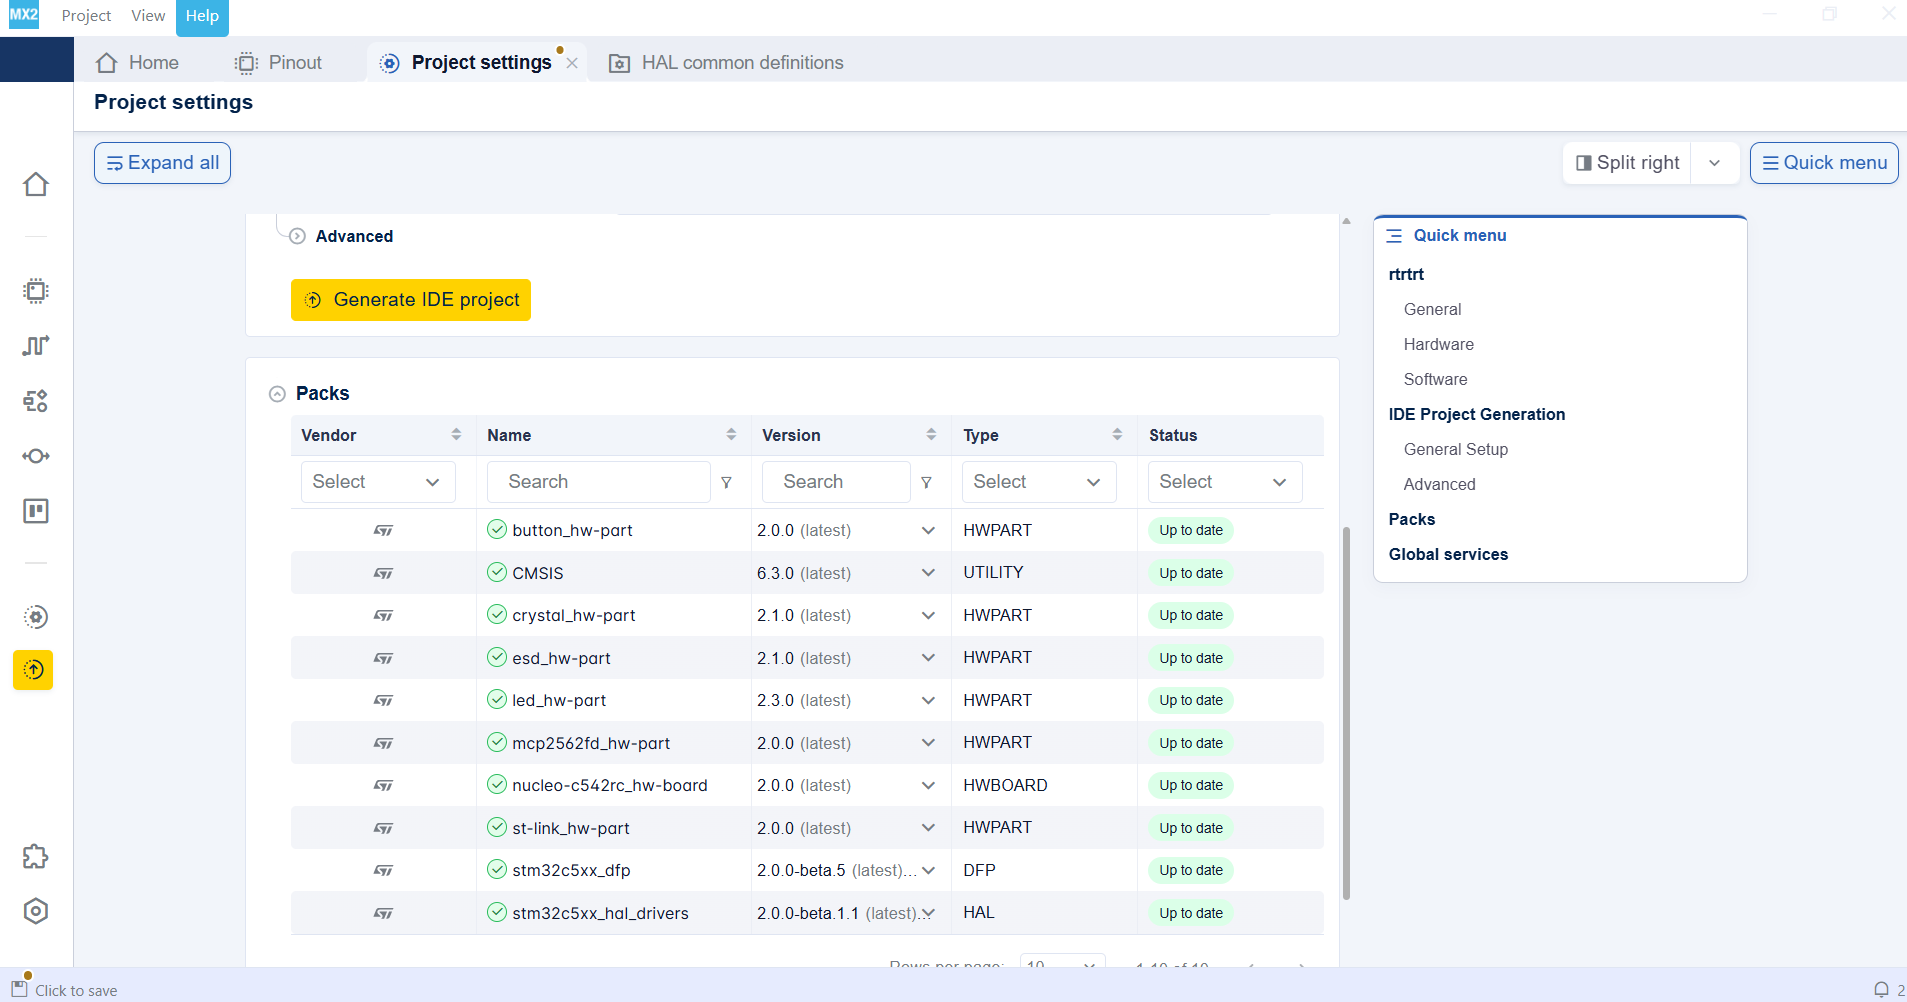
Packs installation 
STM32CubeMX2 includes an automatic synchronization mechanism with the Pack Server. STM32CubeMX2 will regularly connect to the Pack Server to:
Check for new or updated packs
Download and install required packs
Keep your development environment aligned with the latest validated content
This mechanism and the pack management workflow are described in detail in the Pack manager section of the documentation.
Pack manager 
Launch STM32CubeMX2 
To launch STM32CubeMX2, use one of the following methods:
Using the Desktop Shortcut: Double-click the shortcut icon on the desktop to launch STM32CubeMX2.

STM32CubeMX2 from the desktop shortcut 
Using the command-line interface (CLI): Open a command prompt and run one of the following commands:
cube mx start: Launches STM32CubeMX2 and allows you to see logs.
cube mx start –detached: Launches STM32CubeMX2 and returns control to the command prompt.
cube mx start –port <port number>: Launches STM32CubeMX2 on a specified custom port number.

Launch STM32CubeMX2 from the CLI 
Note
For more details about the STM32CubeMX2 CLI, refer to the Command lines interface.
How to update STM32CubeMX2 

A notification is displayed in the bottom right corner of STM32CubeMX2 when a new MX2 version becomes available for download on st.com. To update STM32CubeMX2 to the latest version, follow these steps:
Click on the ‘Open in browser’ button in the message.
You will be redirected to the st.com website to install the new version.
Note
For the 1.0.0 version, only one version of MX2 can be installed on a system at a time. To install a new MX2 version, you must first uninstall the previously installed MX2 version , and then start the installation of the new version.