
Home 
The STM32CubeMX2 home page provides an easy-to-use starting point for STM32 projects.
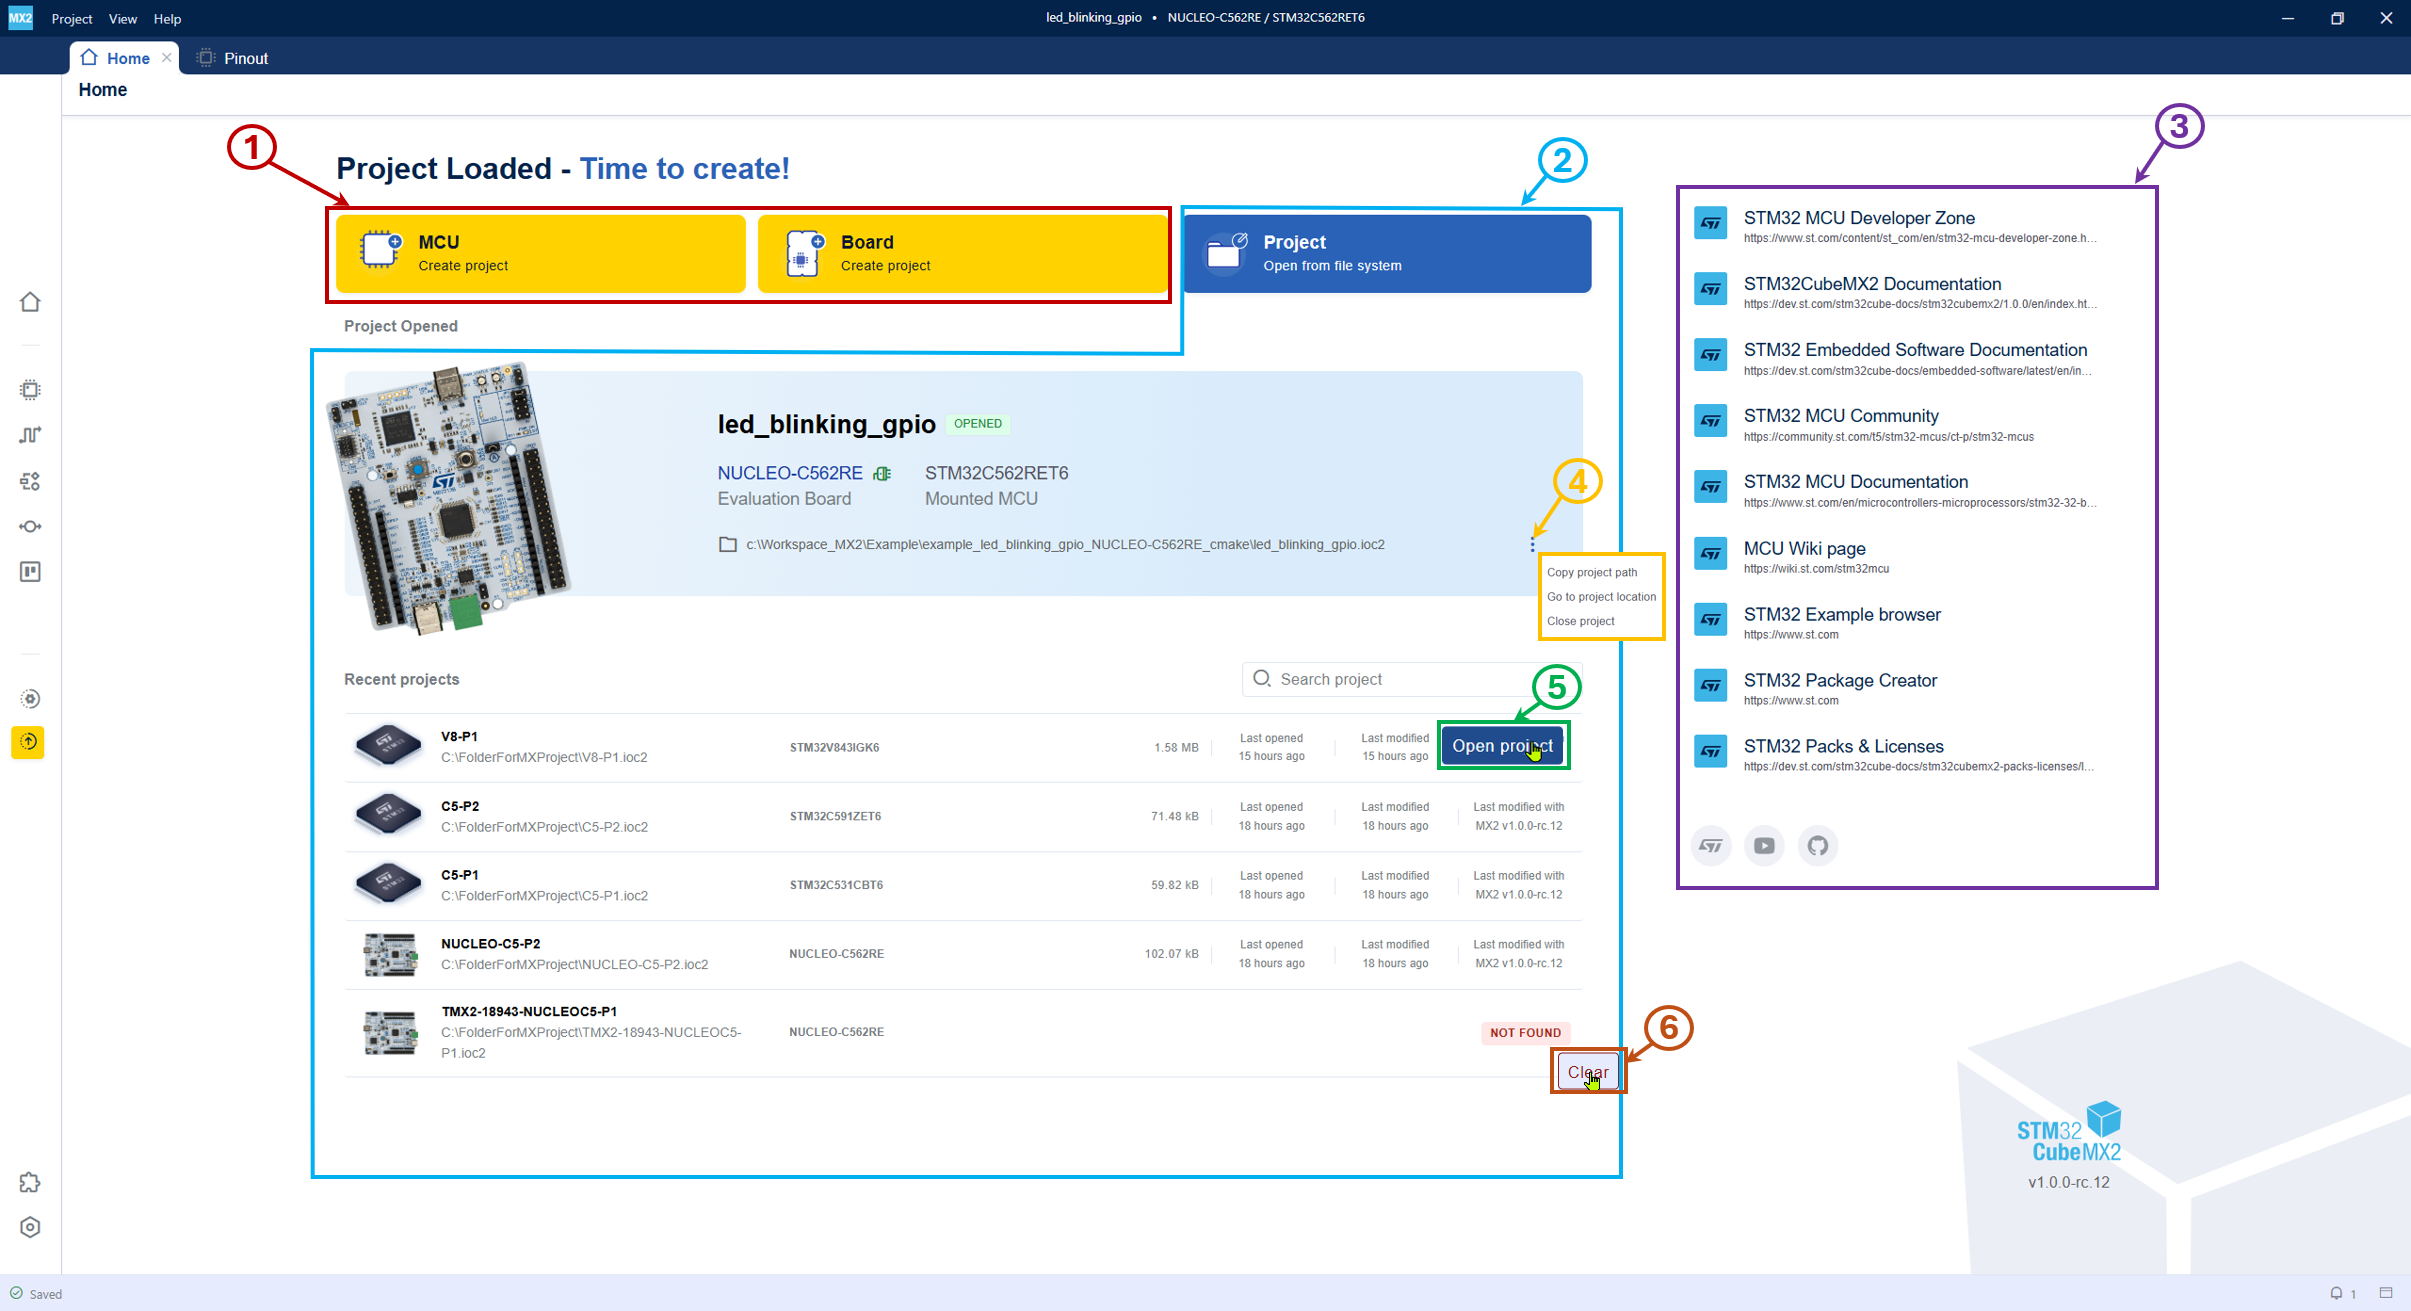
STM32CubeMX2 home page 
This window provides options for the following actions:
Start a new project from (1)
MCU: The tool displays a list of supported MCUs.
Board: The tool displays a list of supported boards.
Open a project (2)
Open project: Browse and select existing projects.
Recent/current projects: Open a recent or current project.
Access useful links to documentation and ST Community (3)
Opened projects (4) possible actions.
Open a project (5) Moving the mouse over a line displays the button open project button.
Clear a project (6) When a recent project is deleted, the Clear button appears. It informs the user that the project was removed and can be cleared from the list.
Note
The left bar displays only the Home, Pack Manager and Settings icons when no project is opened.
The Current project is shown only if a project is open.
Create project from an MCU 
Create a project from an MCU - select MCU 
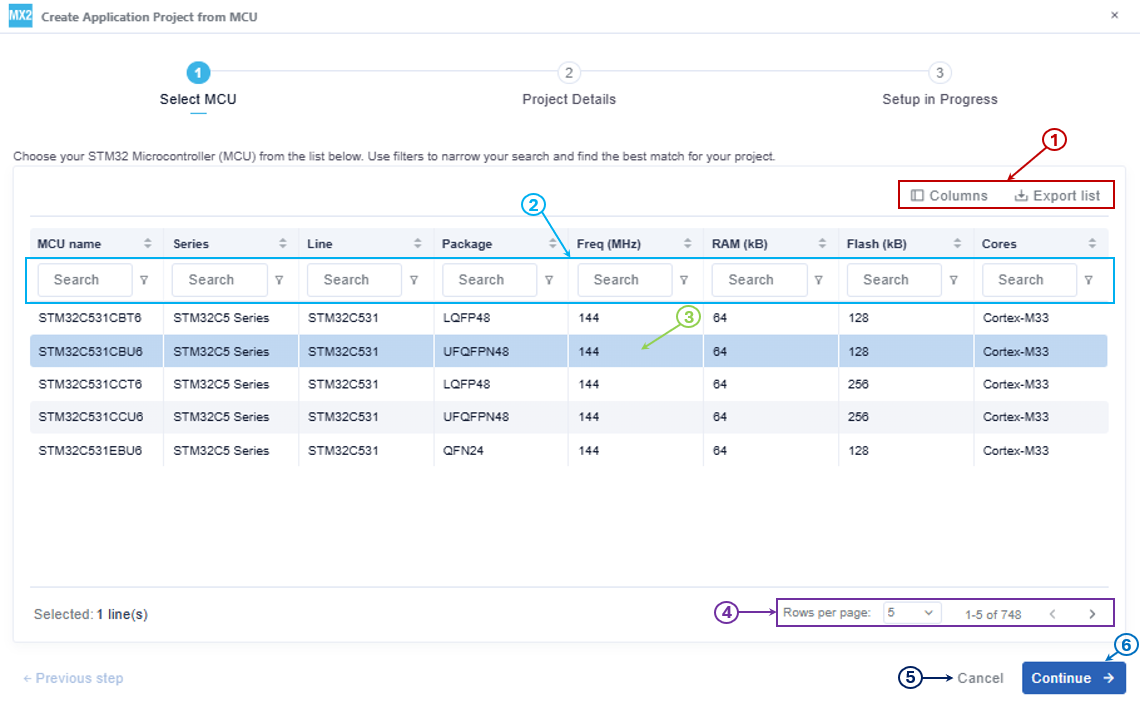
This panel assists users in selecting an STM32 microcontroller and configuring project details for the STM32 development environment.
Columns table settings (1): Customize visible table columns.
Search & filter the MCU list (2): Access the list of available MCUs by clicking on the MCU option. Search, apply filters, or scroll through the list to find the desired MCU.
Select an MCU (3): Select the desired MCU from the list.
Control pagination (4): Use pagination controls to navigate through different pages of the table view. Adjust the number of rows displayed per page.
Cancel creation (5): Click the Cancel button to abort the current setup process.
Continue the project creation (6): After selecting an MCU, click Continue button to continue with project creation.
After selecting an MCU configure the project details.
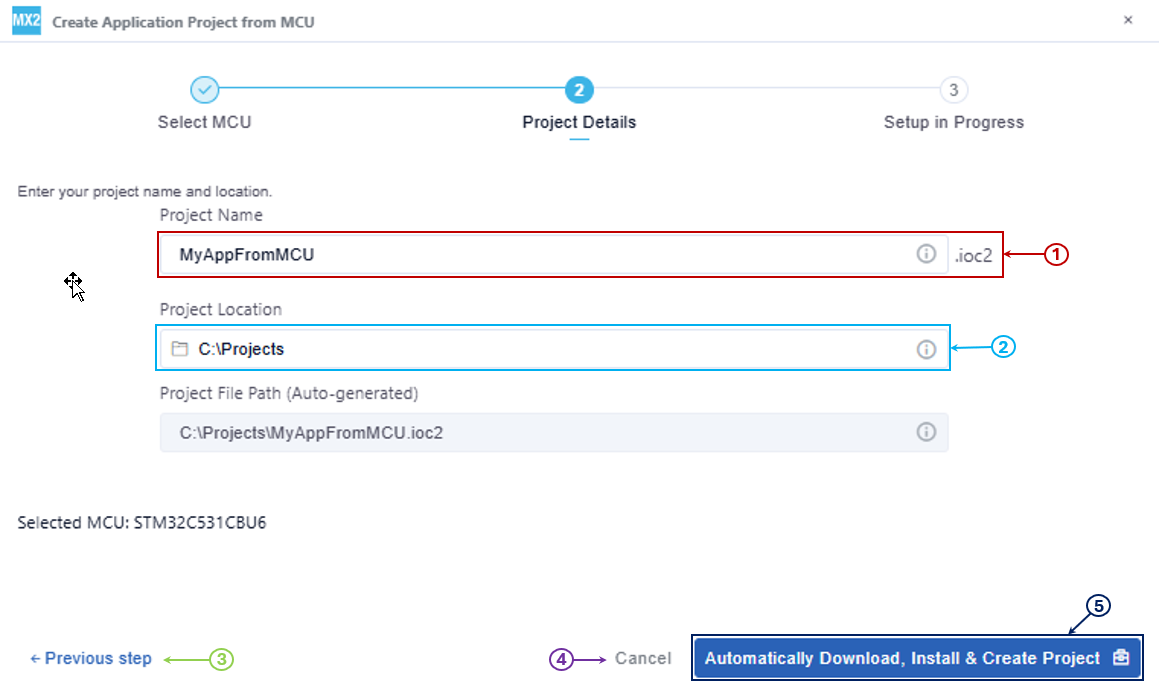
Create a project from an MCU - project details 
Enter project name (1): Input the desired project name in the project name field.
Specify project location (2): Select the directory for storing project files.
Navigate to the previous step (3): Use the previous step option to return to the earlier page.
Cancel (4): Click this button to abort the current project setup process.
Finalize and create a project (5): Click Automatically Download, Install & Create Project to initiate the download and installation of necessary components. Wait for the progress bar to complete, then the project opens.
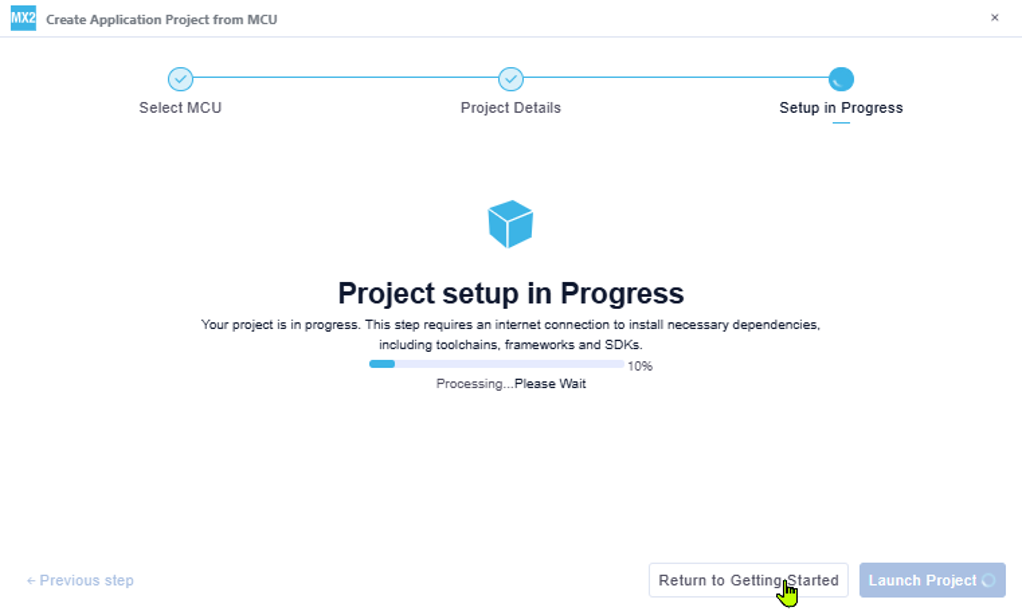
Create a project from an MCU - setup in progress 
Note
When naming a project, do not use special characters. These characters are not permitted in project names.

When creating a project with a name that already exists, a notification alerts you to potential conflicts. To proceed smoothly, select a unique project folder name.

Create project from a Board 
This panel assists users in selecting an STM32 board and configuring project details for the STM32 development environment.
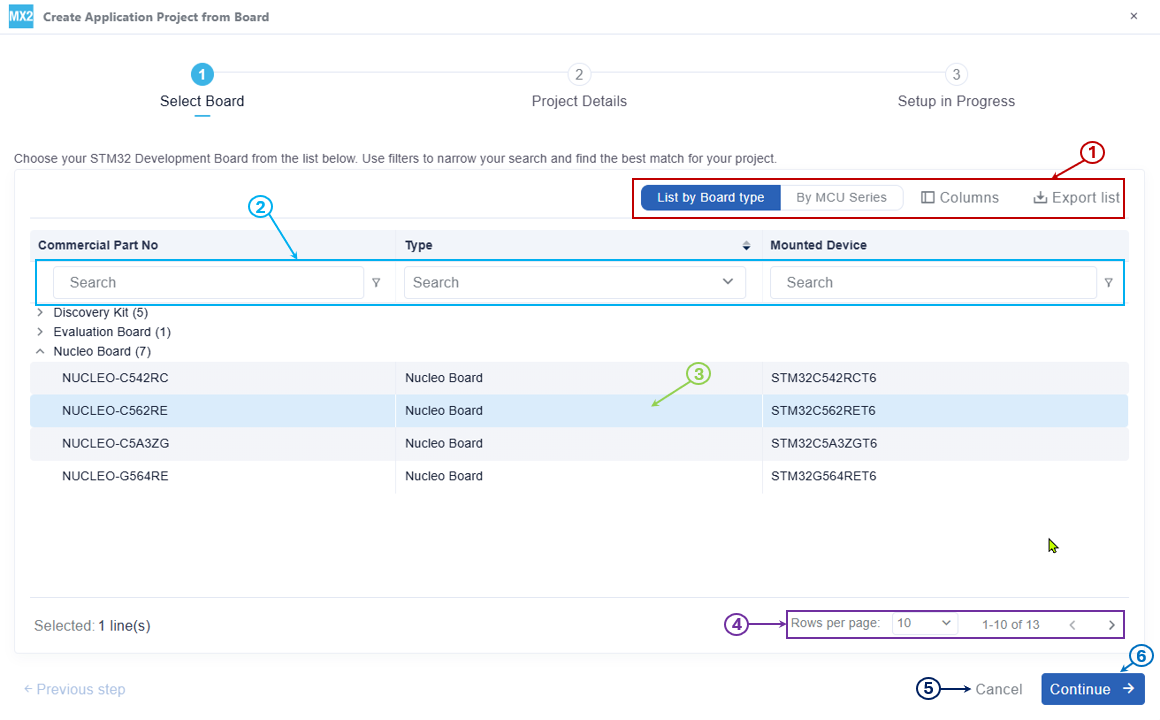
Create a project from a board - select board 
Columns table settings (1): Customize visible table columns.
Search & filter the board list (2): Access the list of available boards by clicking the Board option. Search, apply filters, or scroll through the list to find the desired board.
Selection of a board (3): Select the desired board from the list.
Pagination controls (4): Use pagination controls to navigate through different pages of the table view. Adjust the number of rows displayed per page.
Cancel project creation (5): Click the Cancel button to abort the current setup process.
Continue project creation (6): After selecting a board, click the Continue button to proceed with project creation.
After selecting a board, configure the project details as described in the Create project from an MCU section, as shown in Create a project from an MCU - project details and Create a project from an MCU - setup in progress.
Open project 
A project can be opened in the following ways:

Open project 
File system (1): Click the project button to browse and open a project from the file system.
Current project : Open the current project in two ways.
Click Open Project (2) to open the application current project.
Click Open Project (3) to open a recent project by moving the mouse over the project line.
Clear deleted projects (4): When a recent project is deleted, overpassing the mouse displays the Clear button. It informs the user that the project was removed and can be cleared from the list.
Note
When opening a project, if any necessary packs are missing or have been deleted, STM32CubeMX2 displays a notification. The missing packs must be installed to open and work with the project.
