
Navigation and page structure 
General interface 
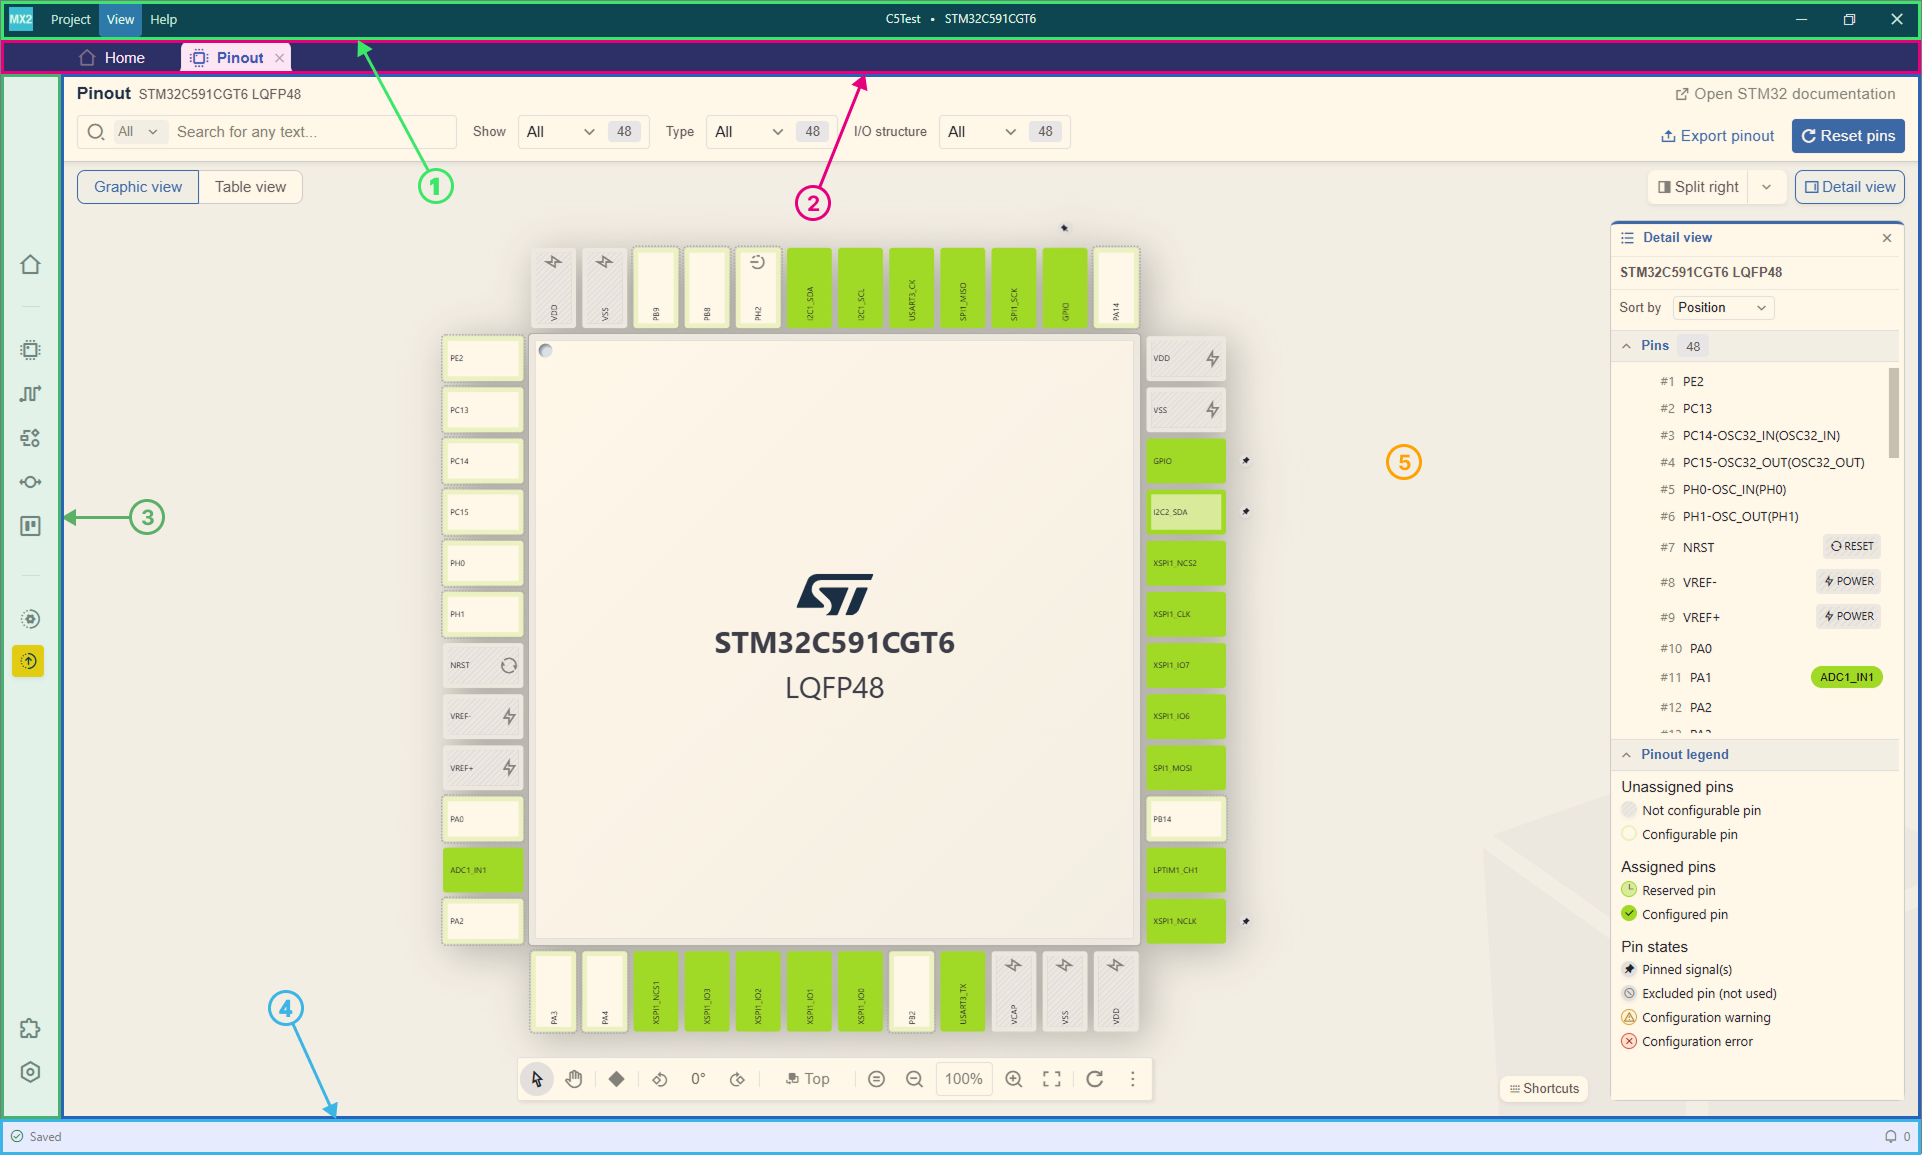
General interface of STM32CubeMX2 
Some elements of the STM32CubeMX2 interface are common to most pages. These elements are the top menu, tab bar, sidebar, and footer.
Tab bar (2) 

Tab bar 
All STM32CubeMX2 pages open in dedicated tabs. Tab headers are displayed in this area. The following actions are available:
Close a tab: click the cross icon on the right of the tab header.
Display a tab: click the tab header.
Move a tab: click and hold the tab header, then drag it to another position.
Note
If too many tabs are open, some tab headers may not be visible. Use the mouse scroll wheel to navigate across tab headers.
A scrollbar will be displayed below the tab headers.
Side bar (3) 
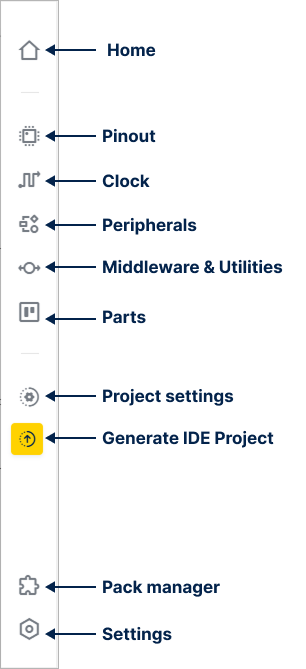
Side bar with an opened project 
The sidebar is used to open new tabs in STM32CubeMX2. The available tabs are:
Home: manage projects.
Pinout: configure and manage microcontroller pin assignments and properties.
Clock: configure and manage MCU clock.
Peripherals: access peripheral configuration pages.
Middleware: access middleware and utilities configuration pages.
Parts: access parts configuration pages.
Project settings: view project information, including generation settings.
Generate IDE project: trigger IDE project generation.
Pack manager: add, remove or update software packs.
Settings: configure STM32CubeMX2 options.
Note
Except the Pack manager and the settings, all sidebar icons are disabled until a project is opened.
Footer (4) 

Footer in a saved state & 11 notifications 
The footer displays different types of information:
Save status: on the left part of the footer, shows the current project’s save status. Possible statuses are “Saved” (all information saved) and “Click to save” (changes made since last save). Click “Click to save” to save the project.
Notifications: on the right part of the footer, there’s an icon used to access notifications. Click to display all notifications. The notifications are detailed in the next section.
Main workspace (5) 
The main workspace
is the place where the tabs will be displayed.
It’s possible to display several tab side by side, this will be detailed in the next chapter.
How to use the split view 
It is possible to display several tabs at a time. Tabs can also be resized to adapt to the current task.
There are two main ways to use this system: by using the Split view buttons in the tabs, or by using drag and drop.
Drag and drop 
It is also possible to use a split view by using drag and drop.
Steps :
Click and hold the left button of your mouse while hovering over a tab header.
A blue frame appears when you hover over the rest of the interface. The frame represents where the tab will appear.
Drop the tab.
Note
Each tab can be resized vertically or horizontally.
How to use the zoom 
It’s possible to Zoom In (increase the size of the elements) or Zoom Out (decrease the size of the elements) in STM32CubeMX2.
There’s several way to do it:
With the menu 
To Zoom In or Out, it’s possible to use the menu.
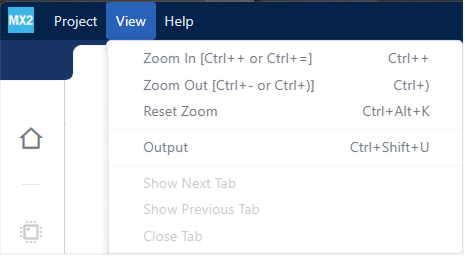
Zoom In and Out in the menu 
Click on ‘View’ in the menu, and:
Click on Zoom In to increase the size of the elements.
Click on Zoom Out to decrease the size of the elements.
With the shortcuts 
It’s also possible to Zoom In or Out with keyboards shortcuts. Depending on your keyboard configuration, you can use:
Click on Ctrl + + or Ctrl + = to increase the size of the elements.
Click on Ctrl + - or Ctrl + ) to decrease the size of the elements.