
 STM32CubeProgrammer

MPU command lines 
Available commands for STM32MPU 
This section details the commands supported on STM32MP1 devices.
|
Long command |
Short command |
Description |
|---|---|---|
|
-c |
Establishes the connection to the device. This command allows the host to open the chosen device port (UART/USB) |
|
|
-p |
Allows the user to know the next partition ID to be executed. |
|
|
-d, -w |
Downloads the content of the specified binary file into a specific partition in the flash or SYSRAM memories. |
|
|
-w |
Loads sequentially the partitions requested by the bootloader using a TSV file. |
|
|
-g, -s |
Executes the device memory starting from the specified address. |
|
|
-rp |
Reads and uploads the specified partition content into a binary file. |
|
|
-l |
Lists all available communication interfaces UART and USB. |
|
|
-q |
Disables the progress bar display during download and read partition commands. |
|
|
-vb |
Allows the user to display more messages and be more verbose. |
|
|
-log |
Stores the whole traffic with maximum verbosity into a log file. |
|
|
-otp |
Manages OTP programming operations. |
|
|
-detach |
Sends a detach command to USB DFU. |
|
|
-gc |
Reads the chip certificate and saves it to a binary file. |
|
|
-wb |
Sends the blob containing secrets and license. |
|
|
-ssp |
Programs an SSP file. |
Command details 
-connect 
Syntax: -c port=<Portname> [noinit=<noinit_bit>] [br=<baudrate>] [P=<Parity>] [db=<data_bits>] [sb=<stop_bits>] [fc=<flowControl>]
|
Option |
Description |
|---|---|
|
port=<Portname> |
Interface identifier: ex COMx (for Windows), /dev/ttySx (for Linux), usbx for USB interface. |
|
[noinit=<noinit_bit>] |
Sets No Init bits, value in {0,1}, default 0. Noinit = 1 can be used if a previous connection is active (no need to send 0x7F). |
|
[br=<baudrate>] |
Baudrate, (for example 9600, 115200), default 115200. |
|
[P=<Parity>] |
Parity bit, value in (EVEN, NONE, ODD), default EVEN. |
|
[db=<data_bits>] |
Data bit, value in (6, 7, 8), default 8. |
|
[sb=<stop_bits>] |
Index of the debug probe. Default index value is 0. |
|
[sn=<serialNumber>] |
Stop bit, value in (1, 1.5, 2), default 1. |
|
[fc=<flowControl>] |
Flow control, value in (OFF, Software, Hardware). Software and Hardware flow controls are not yet supported for STM32MP1 series, default OFF. |
Example
Using UART:
./STM32_Programmer.sh -c port=/dev/ttyS0 p=none
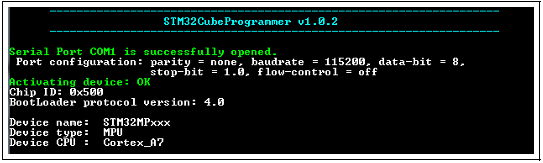
Fig. 142 Connect operation using RS232 
Note
When using the USB interface, all the configuration parameters (such as baudrate, parity, data-bits, frequency, index) are ignored. To connect using UART interface, the port configuration (baudrate, parity, data-bits, stop-bits and flow-control) must have a valid combination.
–phaseID 
Description: This command allows the user to know the next partition ID to be executed.
Syntax: –phaseID
–download,–write 
Description: Downloads the content of the specified binary file into a specific partition in the flash or SYSRAM memories.
Syntax: -w <file_path> [partitionID]
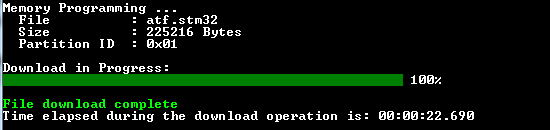
Fig. 143 Download operation 
Note
For U-boot with USB interface, to program the nonvolatile memory (NVM) with the loaded partition using download command, the user must execute a start command with the partition ID. Besides, to execute an application loaded in the NVM, the start address must be specified.
-W 
Description: The embedded flashing service aims to load sequentially the partitions requested by the bootloader. STM32CubeProgrammer needs the TSV file, which contains information about the requested partitions to be loaded.
Syntax: -w <tsv file_path>

Fig. 144 TSV file format 
Note
While programming the Flashlayout.tsv file, U-boot can spend a long time to start correctly, for this reason configure the timeout value by using the timeout command (-tm <timeout>).
–go,–start 
Description: This command allows executing the device memory starting from the specified address.
Syntax: –start [start_address/Partition_ID]
Note
For U-boot with USB interface, to program the NVM with the loaded partition using download command, you need to execute a start command with the partition ID. To execute an application loaded in the NVM, you need to specify the start address.
-readPart 
Description: Reads and uploads the specified partition content into a specified binary file starting from an offset address. This command is supported only by U-boot.
Syntax: –readPart <partition_ID> [offset_address] <size> <file_path>
–list 
Description: This command lists all available communication interfaces UART and USB.
Syntax: -l, –list <interface_name>
–quietMode 
Description: This command disables the progress bar display during Download and Read partition commands.
Syntax: -q, –quietMode
-verbosity 
Description: This command allows the user to display more messages, to be more verbose.
Syntax: -vb <level>
-log 
Description: This traceability command allows the user to store the whole traffic with maximum verbosity level into a log file.
Syntax: -log [filePath.log]
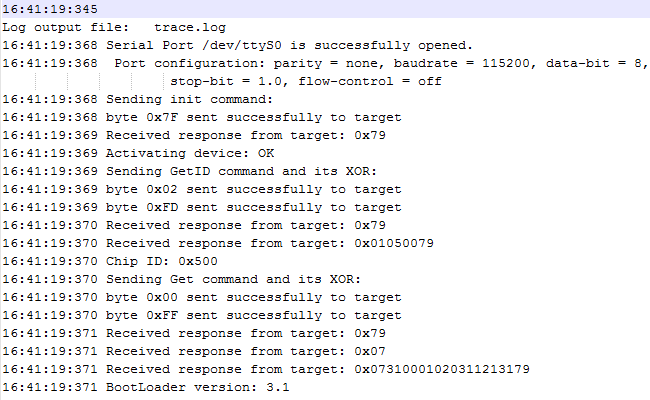
Fig. 145 Log file content 
-otp 
Description: These commands allow the user to program and manage the OTP region from a host computer.
Syntax: -otp write {lock} {word=[index] value=[val]…} / -otp lock {word=[index]…} / -otp displ {word=[index]…} / -otp fwrite {lock} [path.bin] word=[index]
Note
The following OTP commands are not supported in JTAG/SWD debug port connection mode.
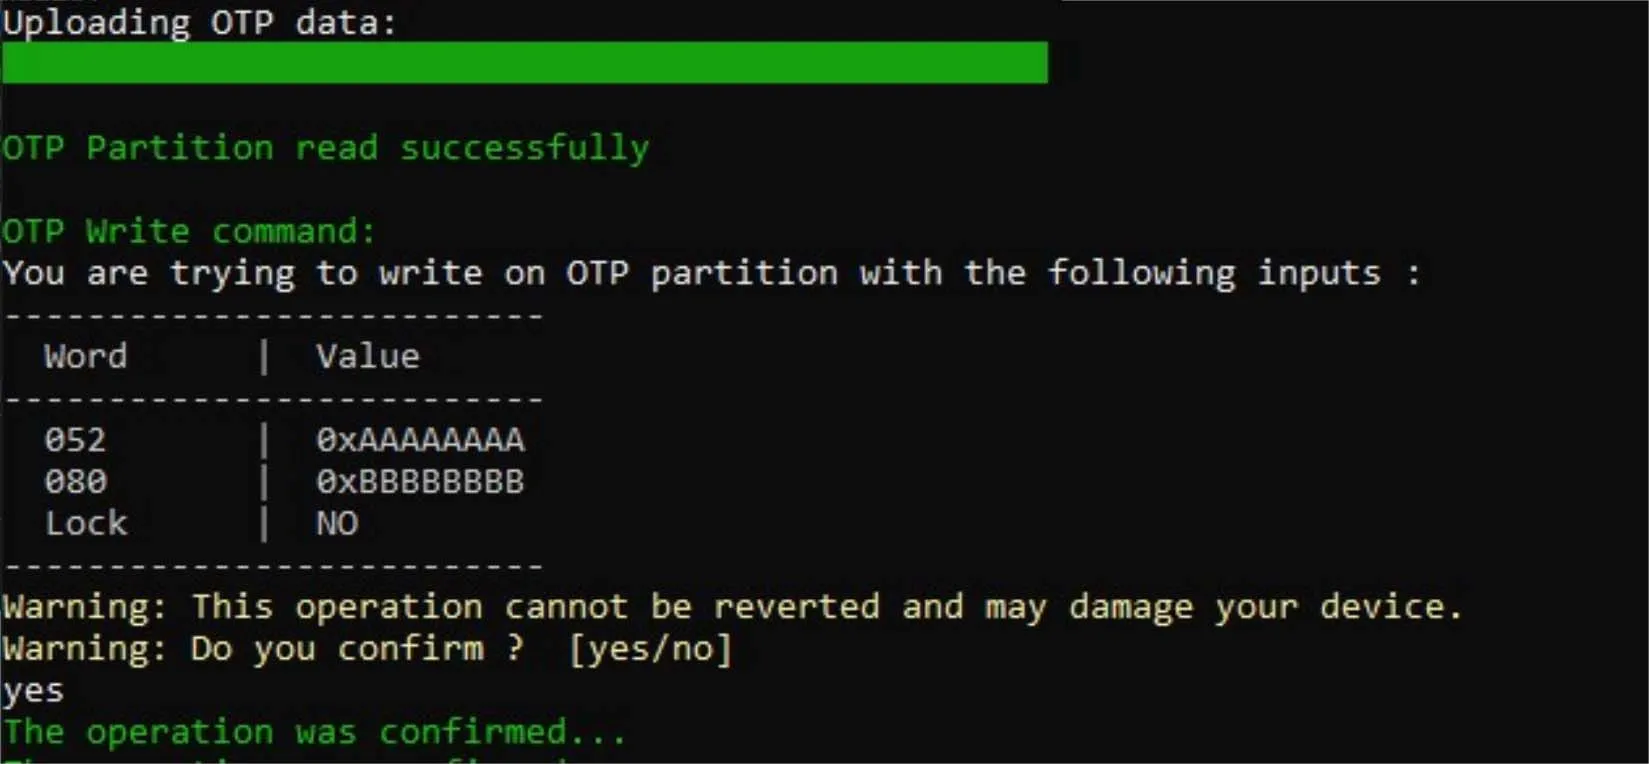
Fig. 146 OTP write command for OTP structure v2 
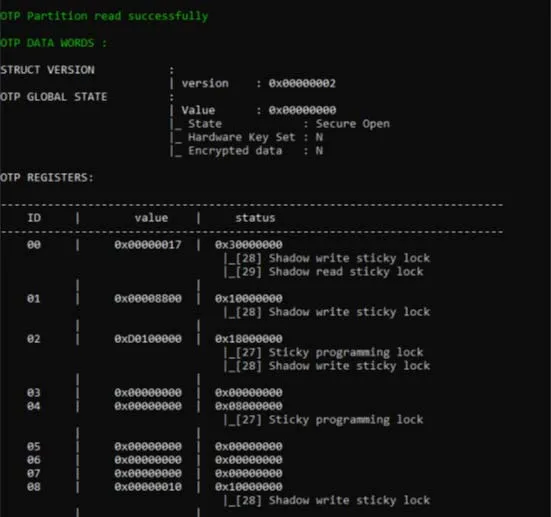
Fig. 147 OTP write command for OTP structure v2 
-detach 
Description: This command allows the user to send detach command to USB DFU.
Syntax: -detach
-gc 
Description: This command can be used to read the chip certificate and save the data to a binary file.
Syntax: -gc <Output_Path>
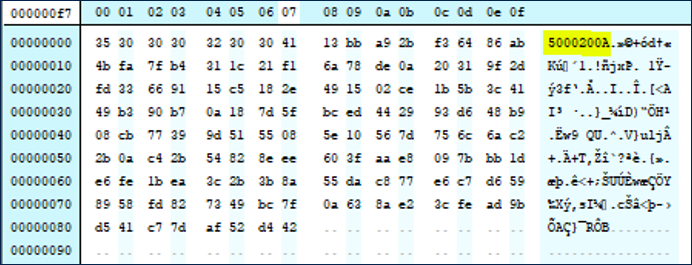
Fig. 148 Get certificate output file 
Note
This command can be used only if a specific firmware (tfa-ssp) is installed, as it is the basis to retrieve the stored certificate.
-wb 
Description: This command allows the user to send the blob (secrets and license).
Syntax: -wb blob.bin
-ssp 
Description: Program an SSP file.
Syntax: -ssp <ssp_file_path> <ssp-fw-path> <hsm=0|1> <license_path|slot=slotID>
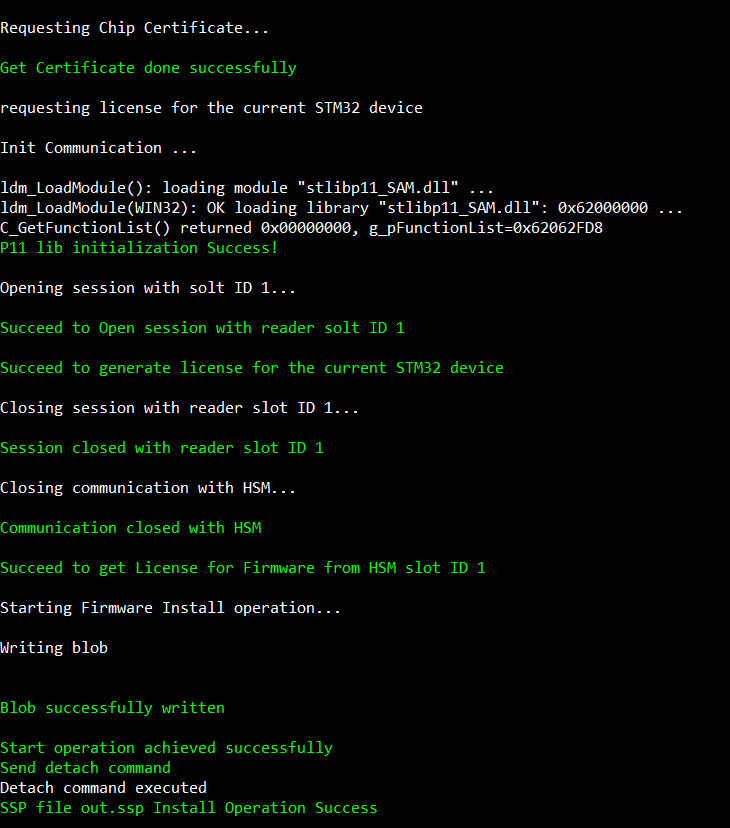
Fig. 149 SSP successfully installed 
Note
All SSP traces are shown on the output console. If there is any faulty input the SSP process is aborted, and an error message is displayed to indicate the root cause of the issue.