
 STM32CubeProgrammer

Installing STM32CubeProgrammer 
This section describes the requirements and procedure for using the software. The setup also offers the optional installation of the STM32 Trusted Package Creator tool, used to create secure firmware files for secure firmware install and update. For more information, refer to UM2238 STM32 Trusted Package Creator tool software description.
Linux install 
If you are using a USB port to connect to the STM32 device, install the
libusb1.0
package by typing the following command:
sudo apt-get install libusb-1.0.0-dev
When using ST-LINK/J-Link probes or USB DFU to connect to a target, copy the rules
files located under the
Driver/rules
folder to
/etc/udev/rules.d/
on Ubuntu:
sudo cp *.* /etc/udev/rules.d
Note
libusb1.0.12
or higher is required to run STM32CubeProgrammer.
Docker and Ubuntu
When using USB DFU in a Docker context, it is often necessary to have the udev
rules installed on the host machine and to create the container (
docker


             run
)
using the following flags:
-v /dev:/dev --device /dev:/dev(to give the container access to the devices on the host machine)--net=host(to propagate udev host events to the container)
VirtualBox
For optimal performance when using STM32CubeProgrammer in a VirtualBox VM, it is recommended to switch the USB Controller to USB 3.0 (xHCI) controller (found in Settings → USB).
Fedora
To install the libusb package on Fedora, execute the following command:
sudo dnf install libusb1
To install the STM32CubeProgrammer tool, download and extract the zip package on
your Linux machine from the
STM32CubeProg-Linux
part number on the website, and
execute
SetupSTM32CubeProgrammer-vx.y.z.linux, which guides you through the
installation process.
On Ubuntu 20, the STM32CubeProgrammer icon is not enabled by default. To enable it, right‑click on the icon and choose Allow launching.
Windows install 
To install the STM32CubeProgrammer tool, download and extract the zip package from
STM32CubeProg-Win-32bits
or
STM32CubeProg-Win-64bits
for, respectively,
Windows 32‑bit and Windows 64‑bit, and execute
SetupSTM32CubeProgrammer-vx.y.z.exe, which guides you through the installation
process.
macOS install 
To install the STM32CubeProgrammer tool, download and extract the zip package from
the
STM32CubeProg-Mac
part number on the website and execute
SetupSTM32CubeProgrammer-vx.y.z.app, which guides you through the installation
process.
Note
If the installation fails, launch it in CLI mode using the command:
./SetupSTM32CubeProgrammer-x.y.z.app/Contents/MacOs/SetupSTM32CubeProgrammer-x_y_z_macos
Make sure you have administrator rights, then double‑click the SetupSTM32CubeProgrammer-macos application file to launch the installation wizard.
In case of error, try this workaround:
Right‑click on
SetupSTM32CubeProgrammer-2.12.0Select Show Package Contents
Navigate to
Contents/MacOsLaunch
SetupSTM32CubeProgrammer-2_12_0_macos
Note
The tool launches automatically after installation if the Launch the tool after install option in the finish install panel is selected.
Debian Package install 
To install the STM32CubeProgrammer CLI tool, download the Debian package and execute the following command:
sudo apt install ./stm32cubeprogrammer_vx.y.z._arm64.deb
DFU driver 
If you are using the STM32 device in USB DFU mode, install the STM32CubeProgrammer DFU driver by running the “STM32 Bootloader.bat” file. This driver is provided with the release package, and can be found in the DFU driver folder. If the DFUSE driver is installed on your machine, first uninstall it, then reboot the machine and run the previously mentioned “.bat” file. Check the ”Delete the driver software for this device option” to avoid reinstalling the old driver when, later, a board is plugged in.
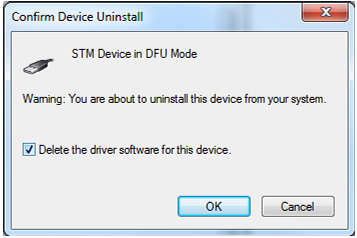
Fig. 2 Deleting the old driver software 
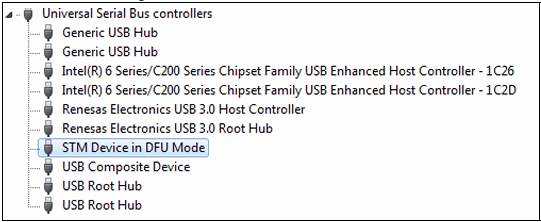
Fig. 3 STM32 DFU device with DfuSe driver 
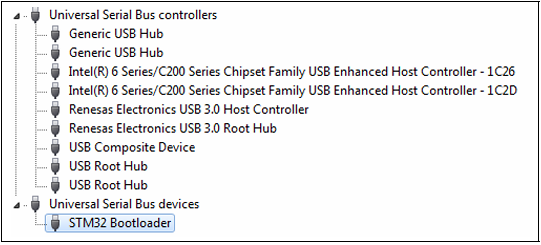
Fig. 4 STM32 DFU device with STM32CubeProgrammer driver 
Note
When using USB DFU interface or ST-LINK interface on a Windows 7 PC, ensure that all the drivers of the USB 3.0 controller drivers are updated. Older versions of the drivers may have bugs that prevent access or cause connection problems with USB devices.
ST-LINK driver 
To connect to an STM32 device through a debug interface using ST-LINK/V2, ST-LINKV2-1, ST-LINK-V3, or ST-LINKV3Power, install the ST-LINK driver by running the “stlink_winusb_install.bat” file. This driver is provided with the release package, it can be found under the “Driver/stsw-link009_v3” folder.
Segger J-link/Flasher library 
The Segger J-link/Flasher library is not mandatory for using STM32CubeProgrammer with other interfaces. If you want to build your own package without using it, the library can be deleted without impact on STM32CubeProgrammer.
Installing STM32CubeProgrammer from command line 
An installation from console window can be launched in interactive mode, or with a script generated via the installer.
To perform interactive installation, proceed as follows: - Extract (unzip) into a folder the installer file (SetupSTM32CubeProgrammer_win64.exe). - Open a Standard console window with administrator rights. - Navigate to the extracted folder using the command: cd <folder path>. - Run the command jrebinjava -jar SetupSTM32CubeProgrammer-X.Y.Z.exe -console. An initial panel is displayed to start the installation process. At each installation step, an answer is requested.
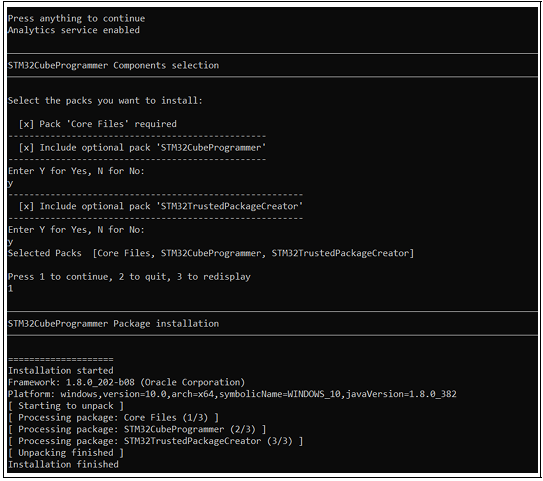
Fig. 5 Installation in interactive mode 
Automatic/Silent installation mode 
At end of an installation, performed either using STM32CubeProgrammer installer graphical interface or console mode, it is possible to generate an auto-installation script containing user configuration and preferences selected during the installation process.
To launch the installation in automatic/Silent mode, proceed as follows: - Extract (unzip) into a folder the installer file (SetupSTM32CubeProgrammer_win64.exe). - Open a Standard console window with administrator rights. - Navigate to the extracted folder using the command: cd <folder path>. - Run the Command jrebinjava -jar SetupSTM32CubeProgrammer-X.Y.Z.exe ABSOLUTE_PATH_TO_AUTO_INSTALL.xml. The installation starts without user interaction.

Fig. 6 Auto-install using Console mode 
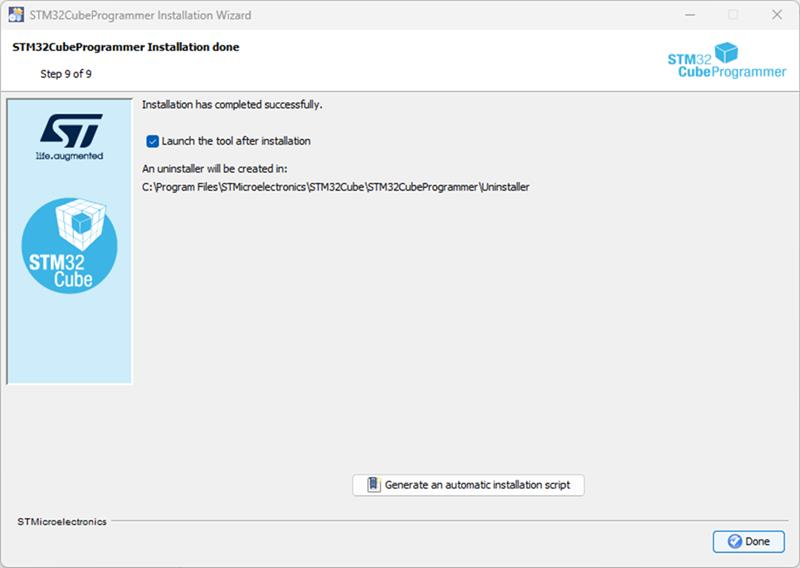
Fig. 7 STM32CubeProgrammer installer graphical interface 